It's Yorkshire Day today and to celebrate my beautiful adopted county I'm having a pattern sale - 25% off all my pattern until midnight 2nd August! No coupon needed, discount will be applied at checkout.
Alexandria Gauntlets
Your Custom Text Here
It's Yorkshire Day today and to celebrate my beautiful adopted county I'm having a pattern sale - 25% off all my pattern until midnight 2nd August! No coupon needed, discount will be applied at checkout.

Alexandria Gauntlets
I love knitting baby clothes for my friends little ones and when I was offered the opportunity to review Vintage Knitting for Babies by my friend Rita Taylor, I jumped at the chance.

This book does not disappoint. It has over 30 gorgeous patterns for newborns to 18 months old and is inspired by Rita's expertise and love of vintage patterns from the Victorian era to the 1950's. There are traditional christening outfits with all over lace and long flowing skirts as well as more modern interpretations with two piece outfits and little lacy jackets. I love this cute little Christening vest top for boys.

Wood Sorrel Christening Vest & Shorts by Rita Taylor
There are some really gorgeous patterns in this book. It was really hard to choose just a few to share with you. I'm hoping to knit this little outfit (Betony Coat and Beret) for my goddaughter. Like a lot of the patterns in the book, Rita gives an insight into the history to the design and I love the use of the simple but effective stitch pattern.

Betony Coat and Beret by Rita Taylor
My favourite pattern is probably (it is tough to choose) this Poppy Duffle Coat and Mittens. It looks warm and woolly and like all the patterns, practical for a baby too. It looks wonderful knitted up in modern soft yarns (this one is Brown Sheep Nature Spun Sport Weight).

Poppy Duffle Coat and Mittens by Rita Taylor
Each pattern has clear instructions to follow with the rows and new sections all given in bold print making this an easy book of patterns to follow. This is a book where every pattern demands to be knitted and cherished or given as a special gift, from the soft toys to special outfits for a first trip out.

Primrose Rabbit by Rita Taylor
The whole book is beautifully illustrated, from the beautiful picture on the front cover above to the gorgeous photography inside. Each pattern has several photos modelled on cute kids to see the finished garment clearly. The hardback format makes this a book that demands to be kept for all future baby knitting needs and a permanent fixture on my bookshelf. I can see me picking up this book again and again for each new baby that comes into my life.

Sweet Violet Lacy Matinée Set by Rita Taylor
This one is definitely a keeper!
Vintage Knits for Babies by Rita Taylor, published by Jacqui Small.
Price £20 / US$29.99 and available from the 21st May 2015, ISBN 978-1-909342

Last year my Alexandria Gauntlets pattern was published in the Quick & Easy Crochet supplement to Knit Now issue 35.

I had great fun crocheting these mittens and love how they look so elegant. They are fairly easy to crochet, an adventurous beginner could have a go (and one did yesterday on my How to Crochet course!).

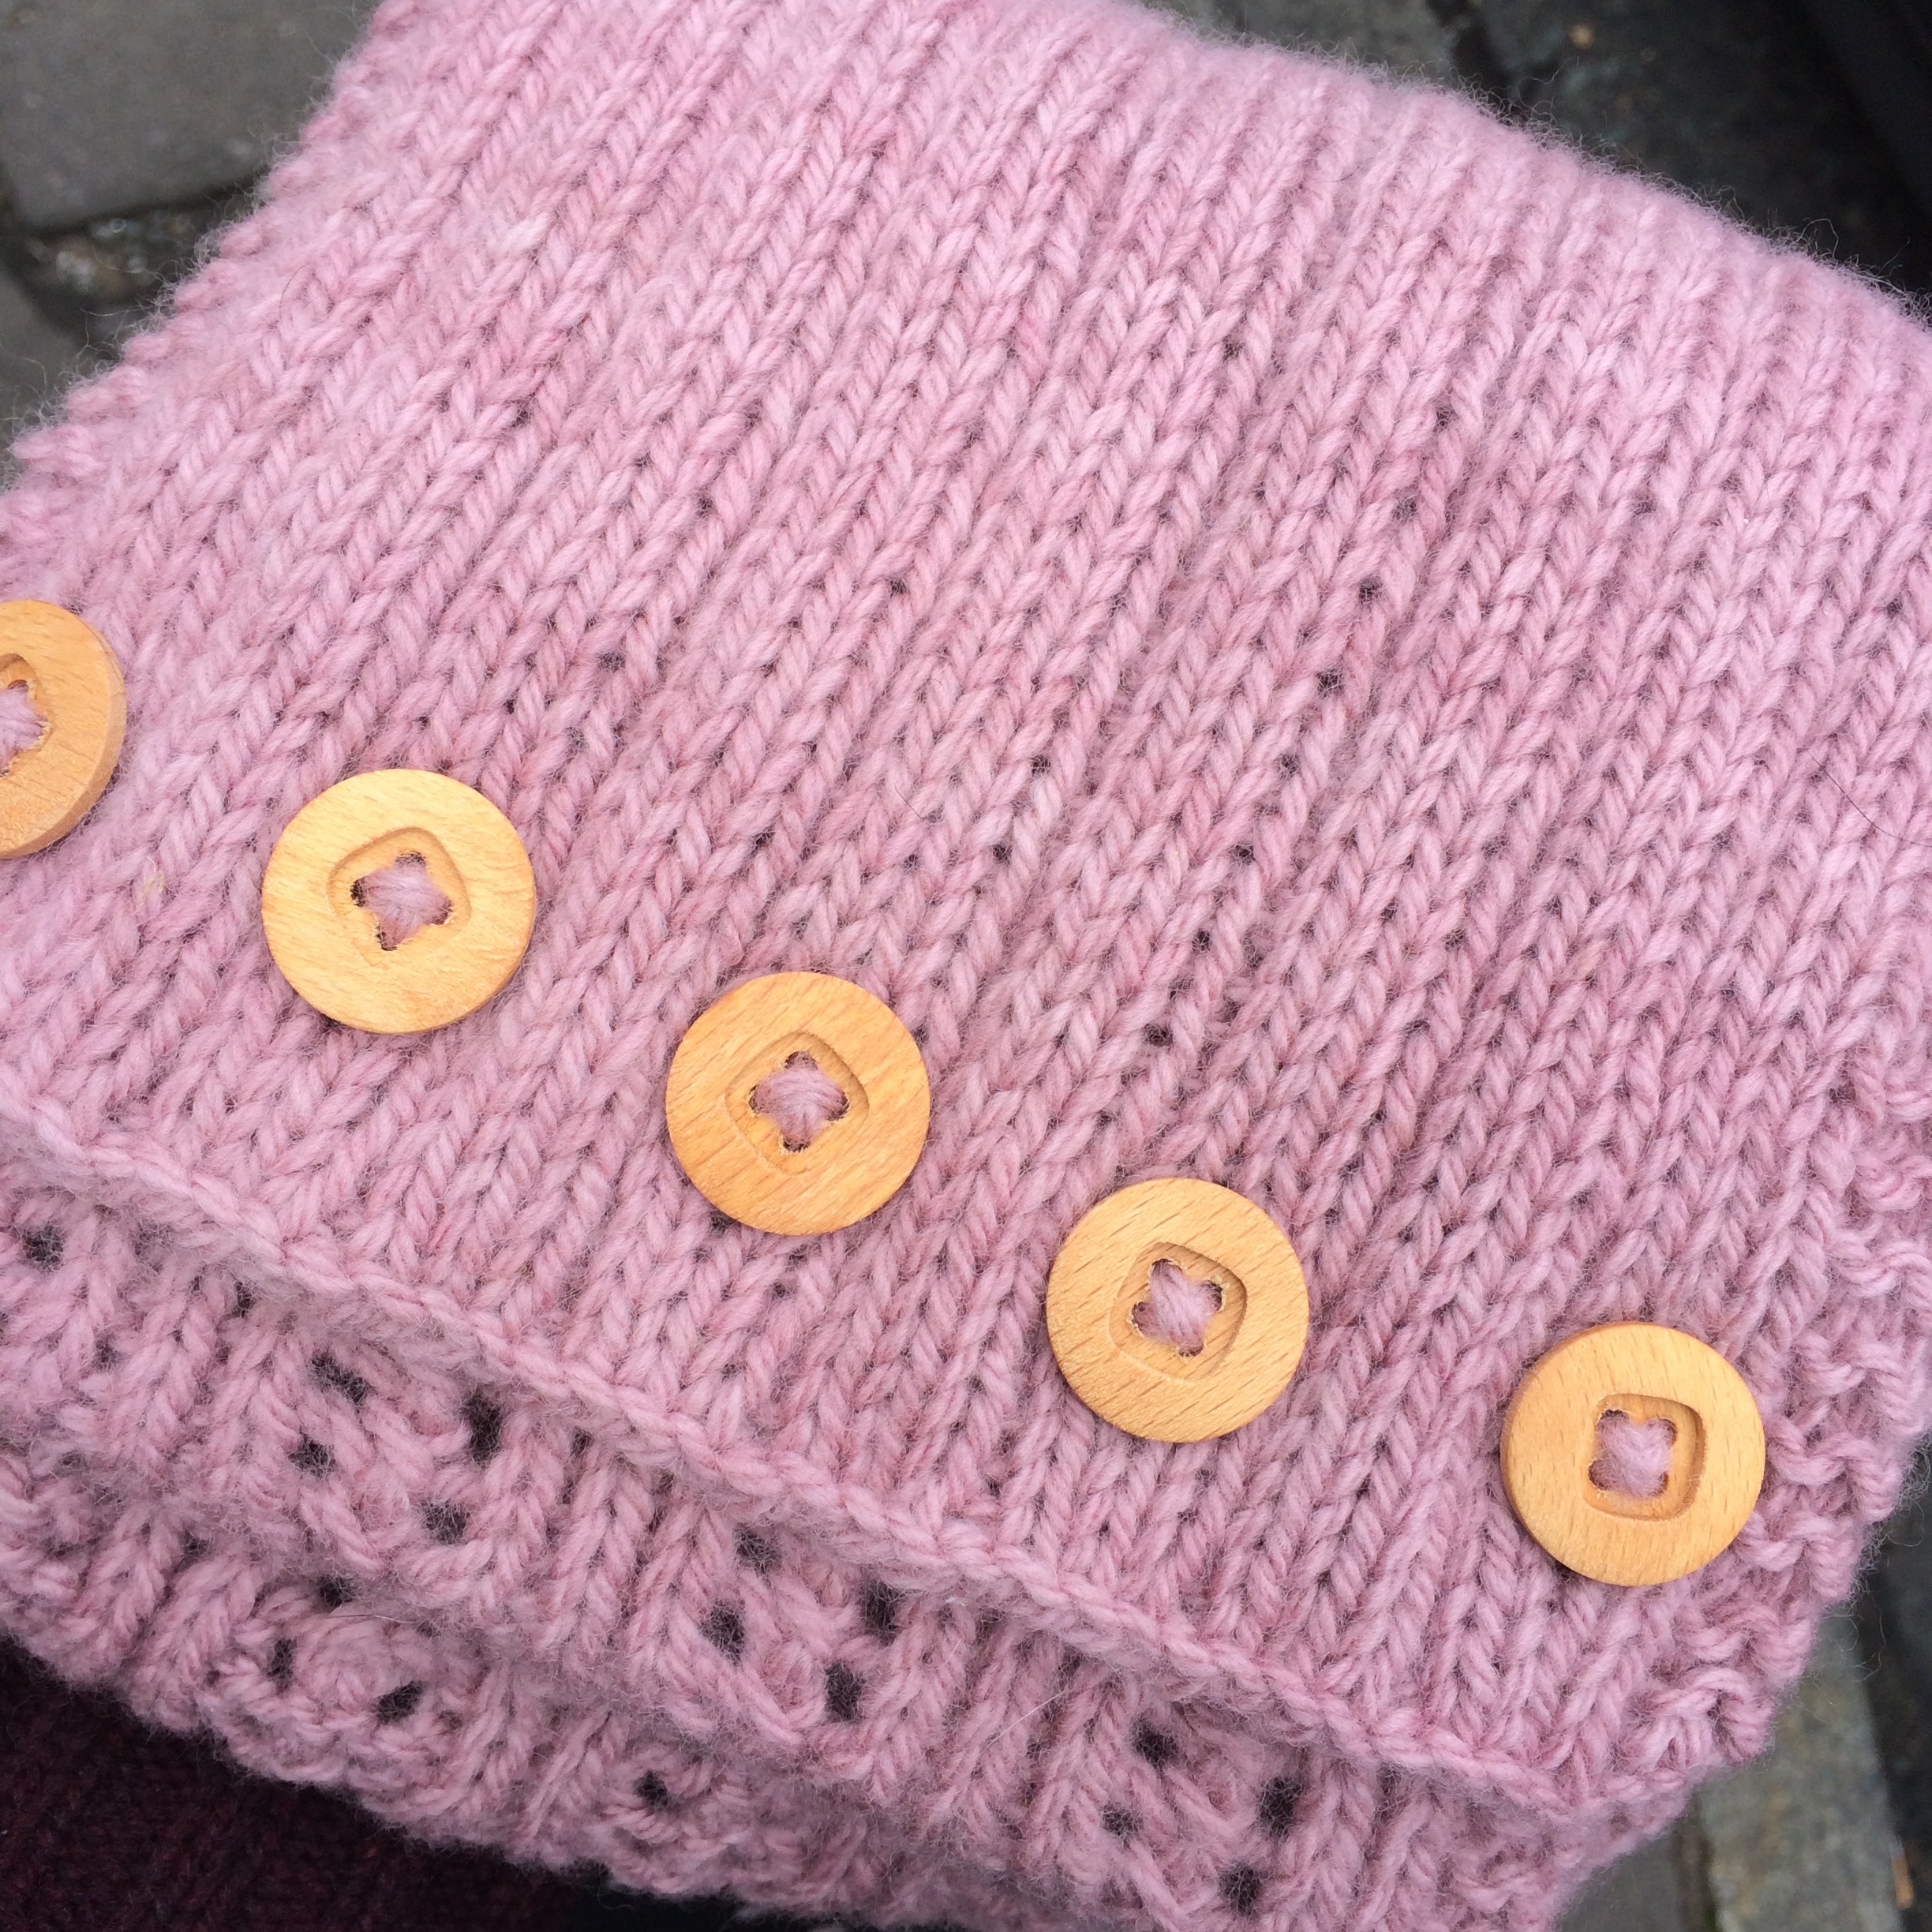
I always had plans to write the pattern for a short version as well as the long mittens so I took the opportunity of being able to reissue the pattern to make these short mittens. I used Shibui Knits Baby Alpaca DK yarn and it only needs 1 skein for the short version. This yarn is so soft and luxurious, I absolutely love it. It shows up the stitch pattern well and I found these cute little matching buttons in my stash.

The name of this pattern is inspired by Alexandria the Great, whose martyrdom gave its name to Catherine Wheel fireworks. The cuffs of these gauntlets use Catherine Wheel stitches to give the pretty radial effect.

For this week only you can get a discount on the pattern price of 50p by using the code MITTENS in the cart checkout on this website or through ravelry. The pattern has also been uploaded to Patternfish and Etsy. There is a bigger discount though in my newsletter to say thanks for signing up so I recommend doing that if you want to buy!
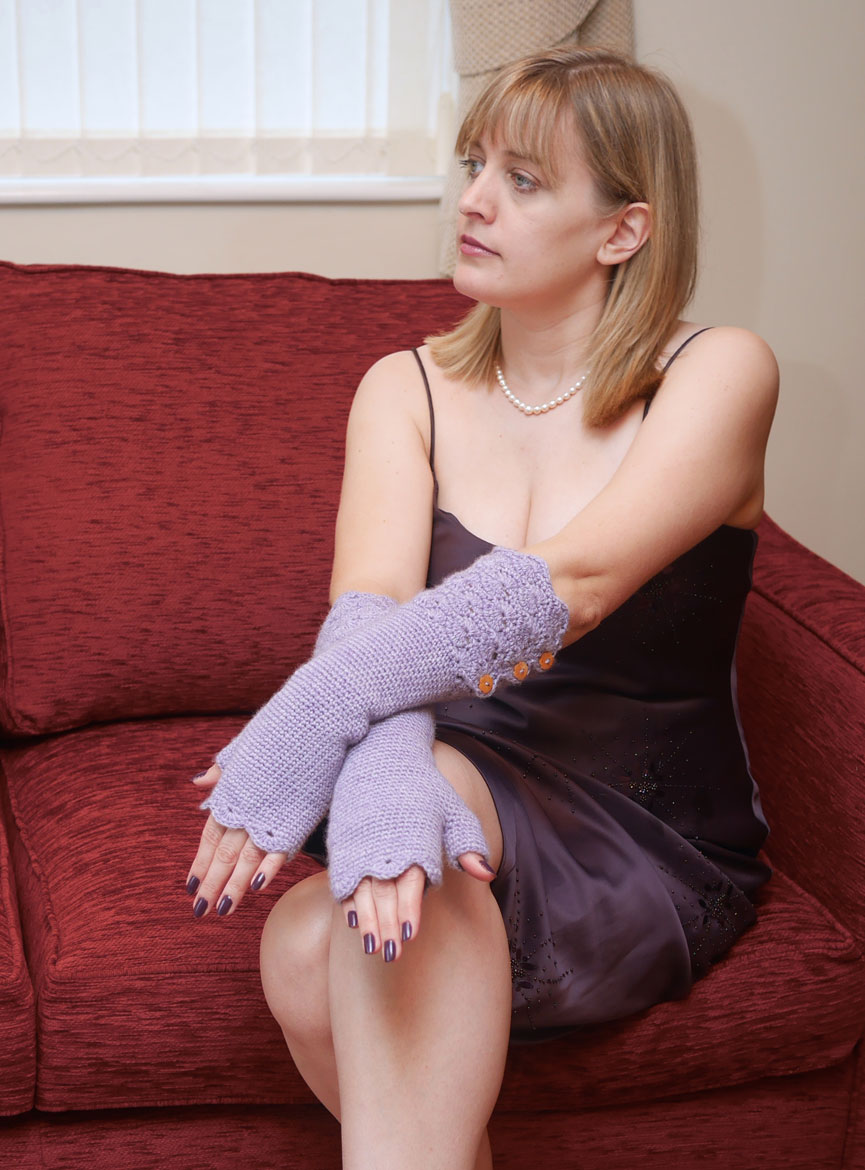
I have to say a huge thank you to my sister Lucy who posed for these shots for me last November. We had plans to photograph outside but the weather got the better of us - and I think she was glad she did not have to wear this dress outside in November!

Thank you also to everyone for the lovely comments on my instagram photos as I posted a daily update when I was crocheting them, it always makes me smile to read them! You can find my daily crafting updates on my profile Aldersign.
So that's two patterns published this week..... next one is due in May!
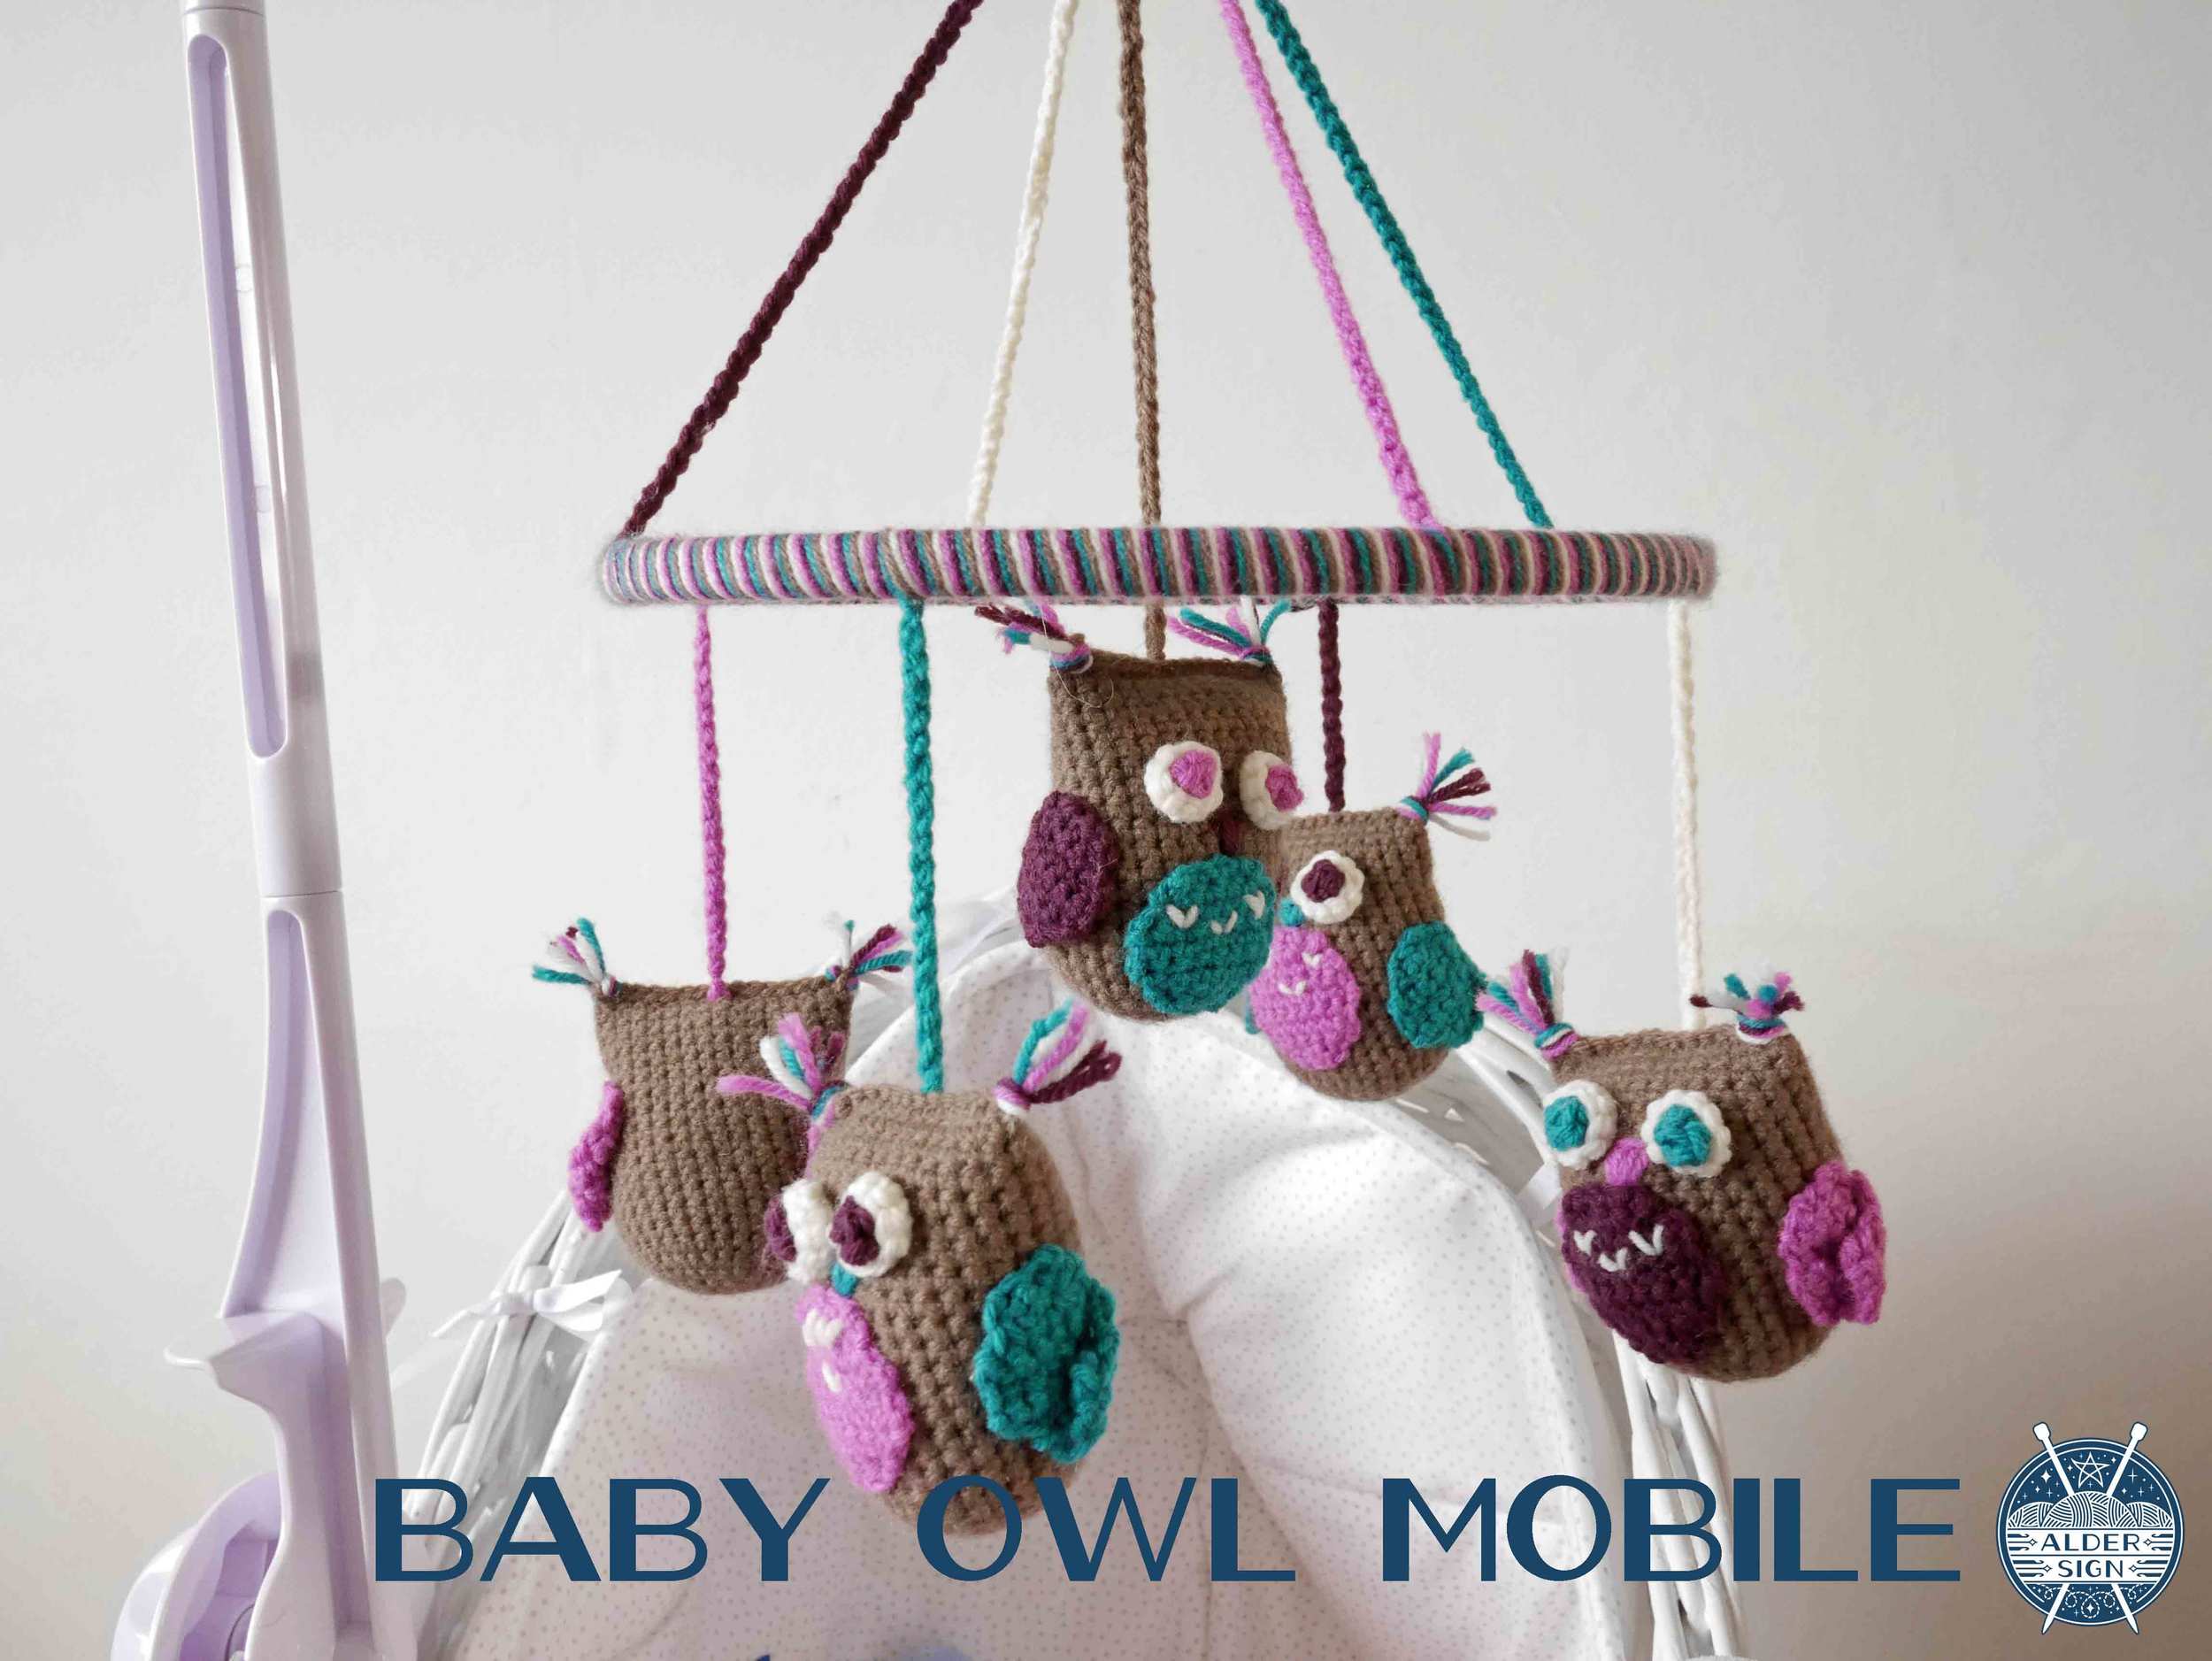
I have a couple of new patterns to release this week and the first one is one of the cutest things I have ever made. The inspiration for this came from my good friend Julia when she was expecting. She asked me to make her a mobile for her baby's crib with owls hanging on it.
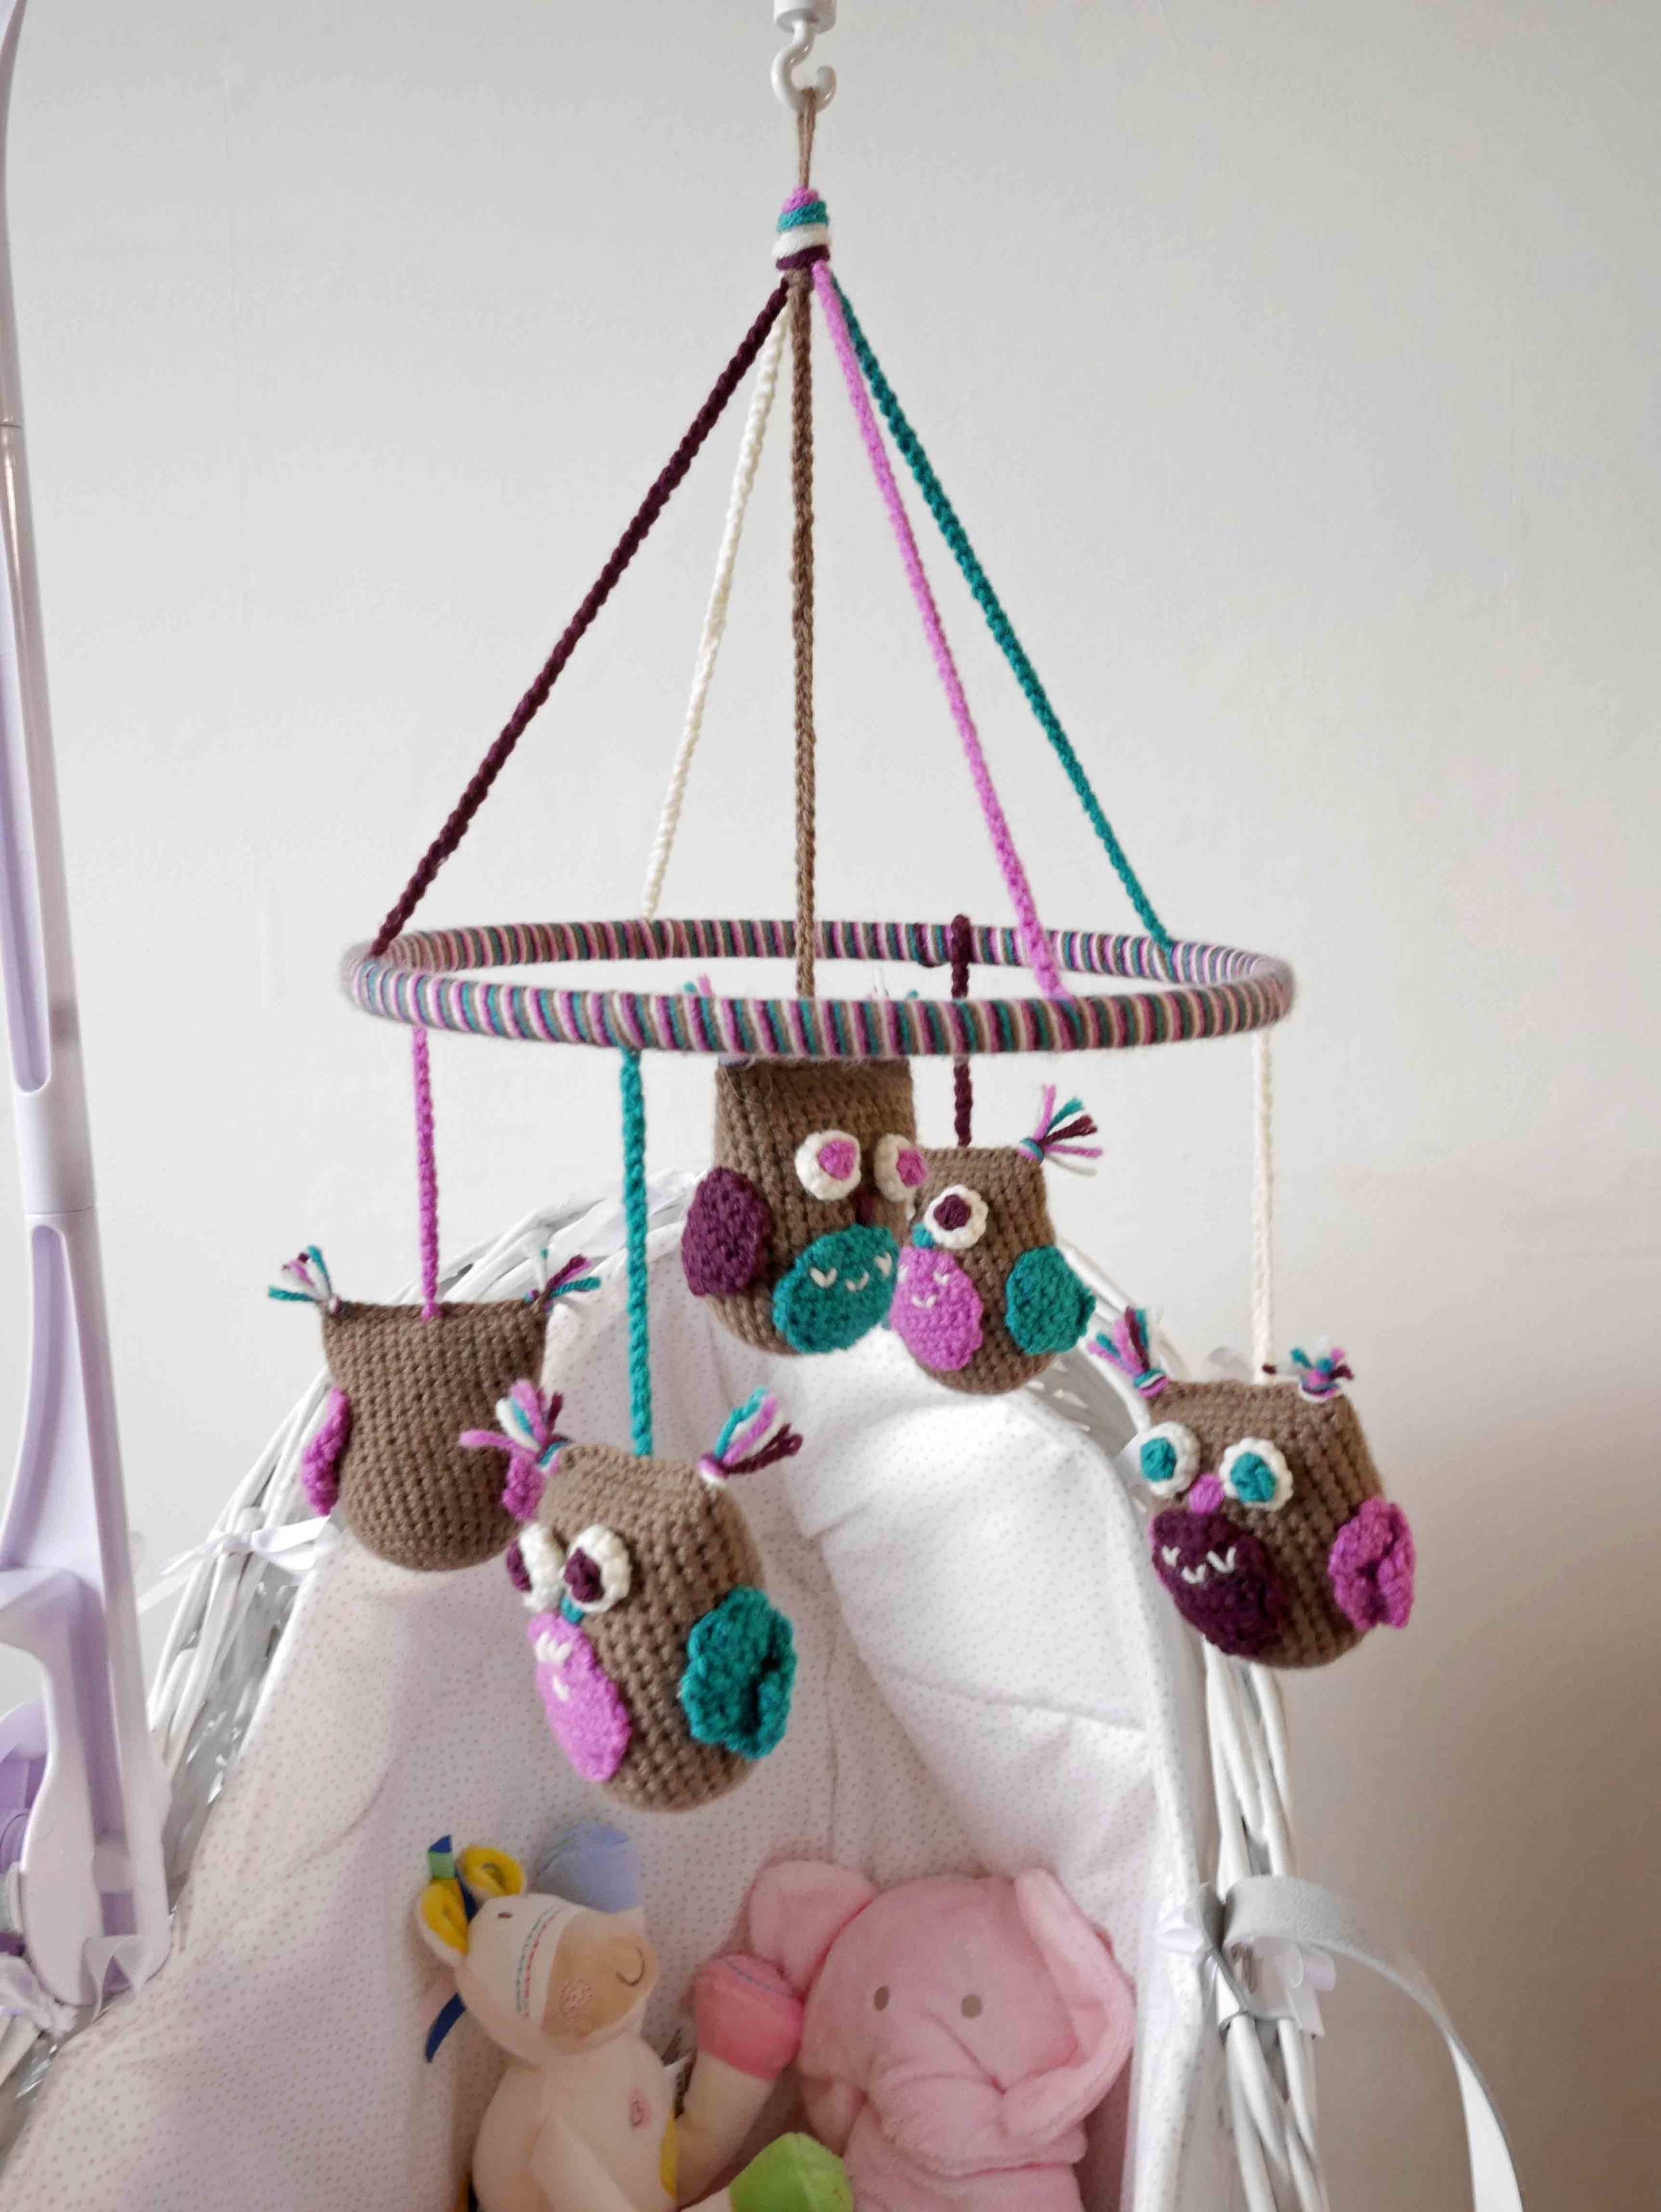
I began making some little crochet owls using the lovely bright coloured yarn she had chosen - I do like bright colours for babies. I had only made one or two when she told me that she was expecting twins and now would like two mobiles!

My two beautiful godchildren, Jensen and Jellica, are now here and getting into mischief but they do still seem to like their mobiles that hang on their cribs.
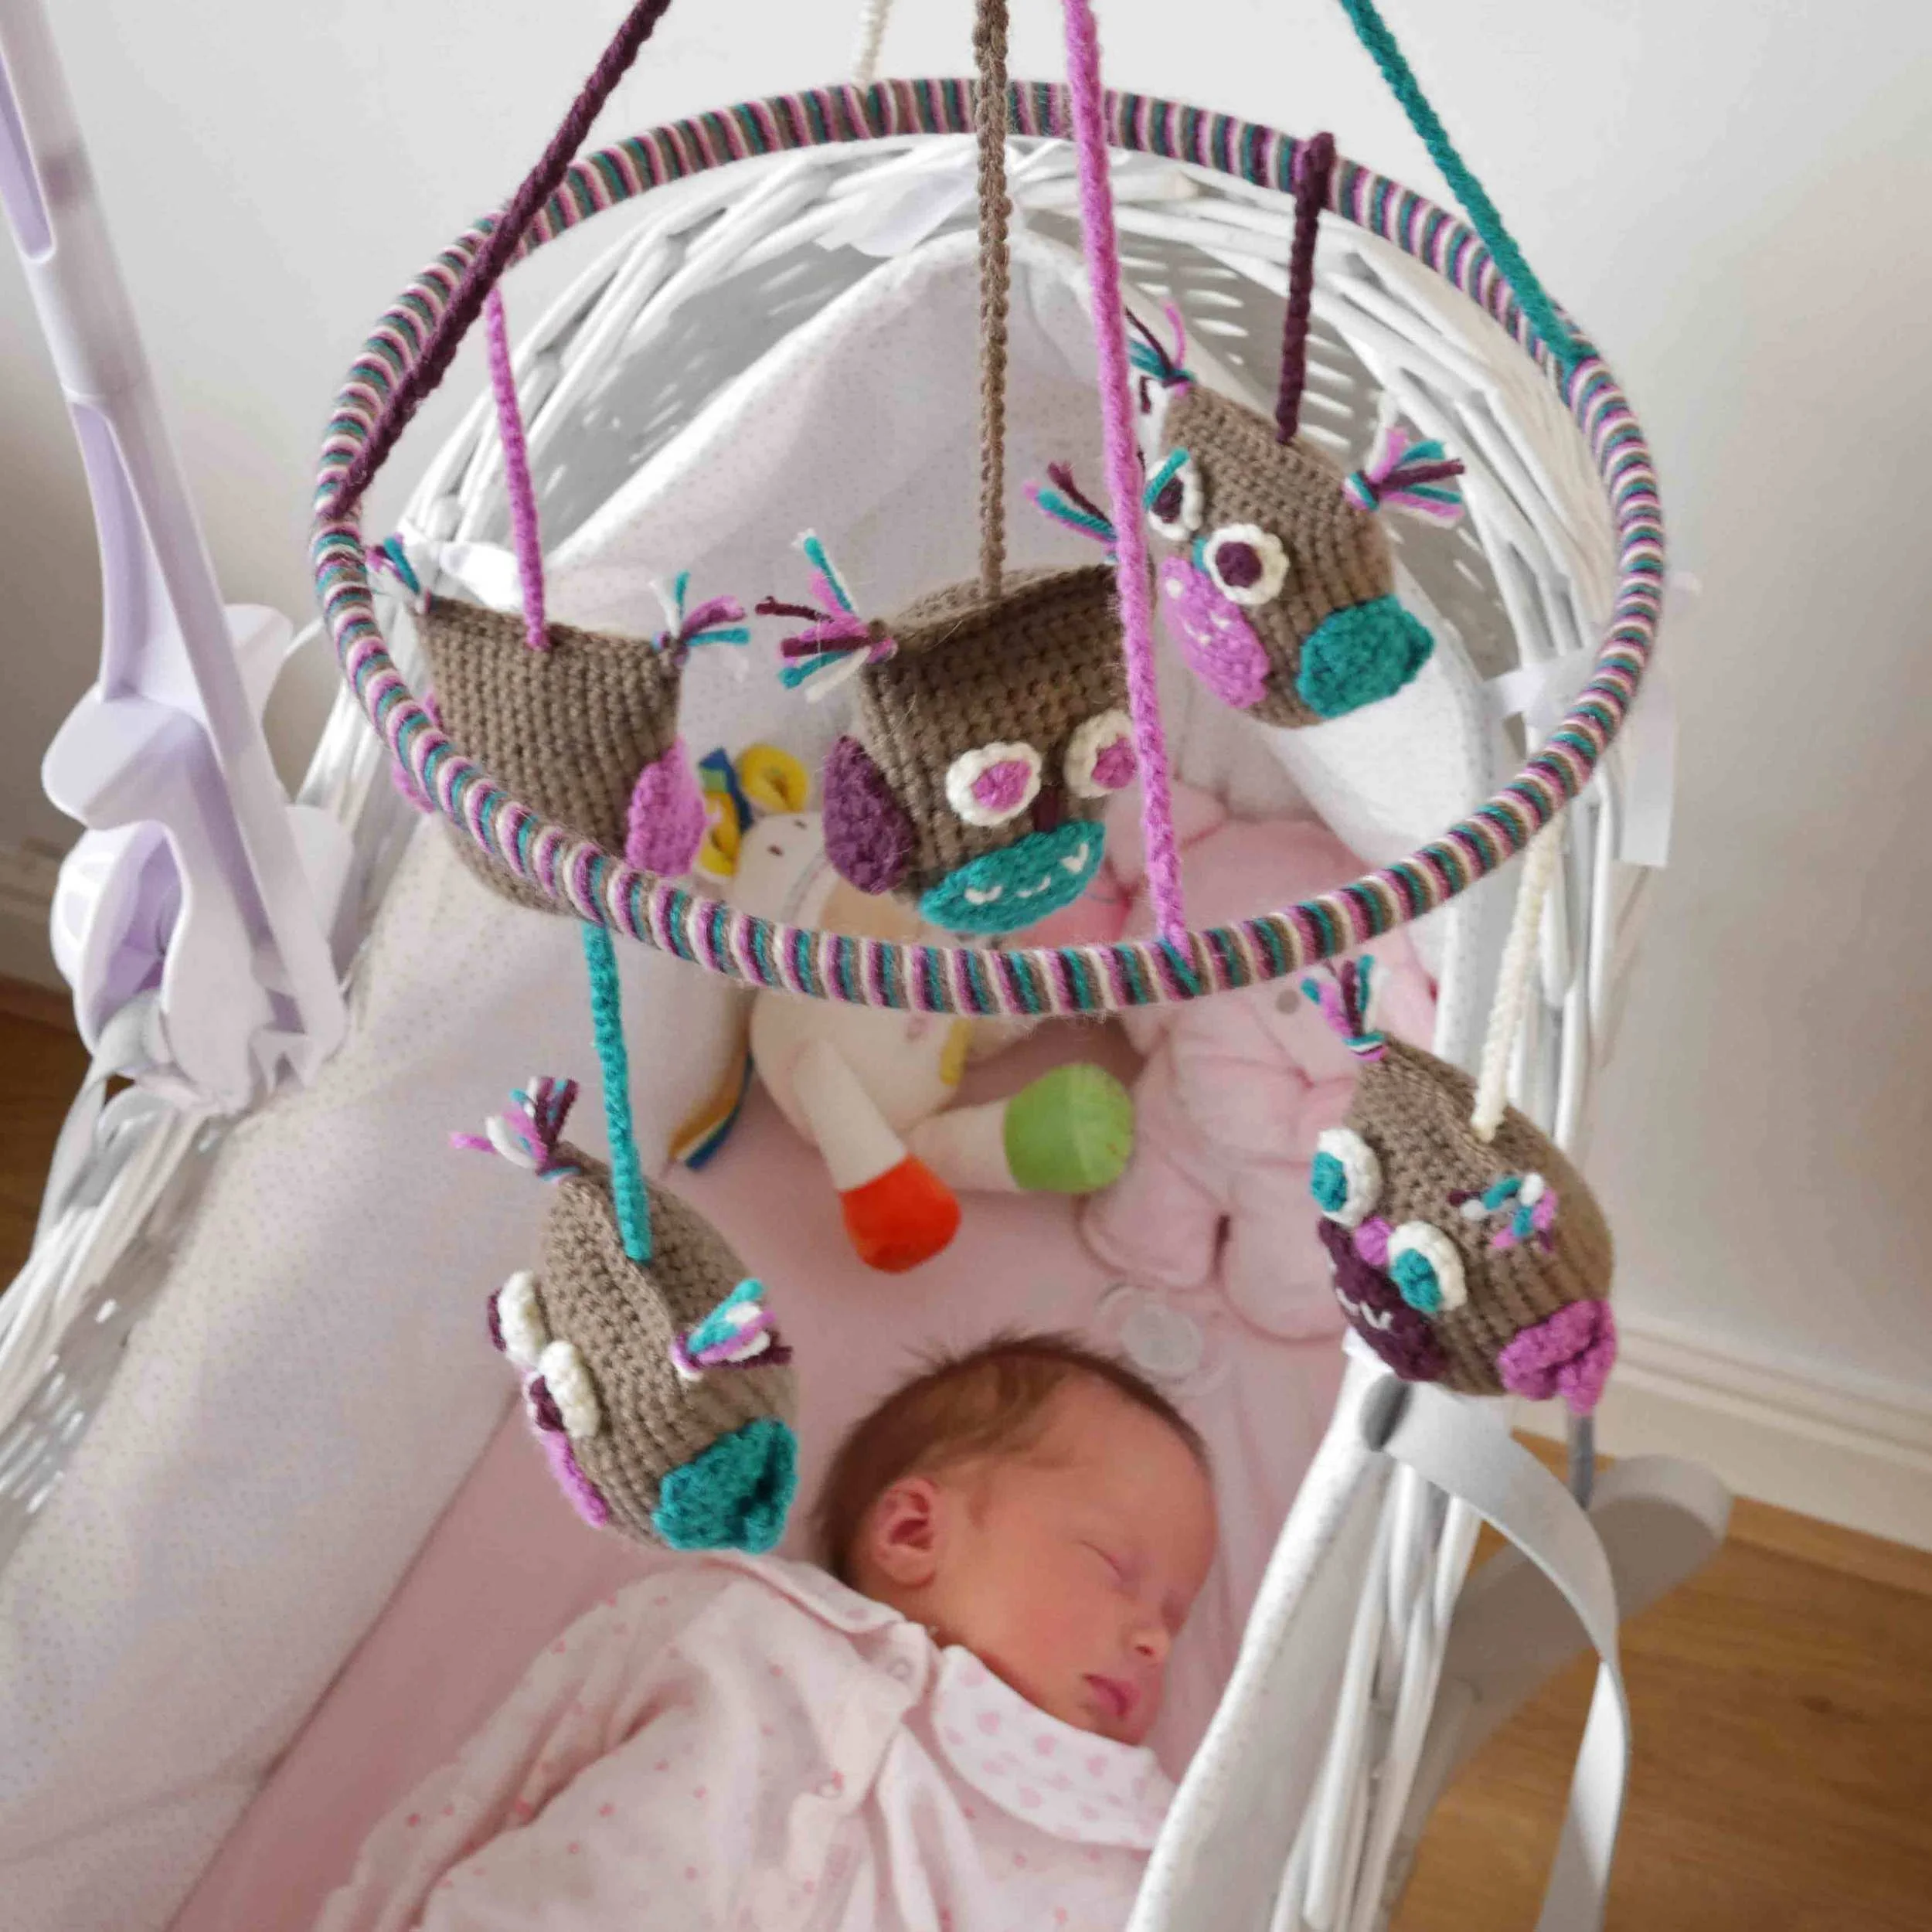
Each owl body is crocheted in the round and lightly stuffed so it is not too heavy. Full instructions are given on how to make each owl, including how to thread the yarn in a bale sling knot for the ears.

The frame the owls hang from is the inside ring of a sewing hoop. I covered it with the same yarn and created crochet chains to hang the owls and the frame with. Full instructions with a picture tutorial are given to create the mobile, including how to make the knot holding it all together at the top.

To hang the mobiles over the cribs we used a mobile crib arm purchased at a charity shop, so each mobile turns and plays music to lull babies to sleep.

This was a really fun make and a great present for any expecting mum.
The pattern can be purchased here and there is a discount code if you sign up to my newsletter for this week only.
Thank you Julia for the inspiration, for letting Jellica be a wonderful model (although she needs to work on the wriggling a bit, the mobile was swinging and difficult to get a photo of!) and have a wonderful first birthday as a mum today.

I am just slightly obsessed with buttons. Show me a crafter who does not have a stash of buttons collected and stored in tins, boxes and scattered around the house.

I personally have 3 boxes of buttons. A box of random buttons that were cheap and are handy for when just one or two are needed. Then there is the tin of buttons cut off the tags of clothing - the spare buttons that you keep long after the clothes have worn out and gone to a new home and some buttons that I inherited from my mum - mostly the spare buttons she saved from clothes but there are also a few gems in there that she bought along the way.

Then there is my fancy button box that contains all the buttons I buy. Most of these are bought without a specific project in mind. They just called to me and I had to own them just in case. I pick up buttons in craft shops, yarn shops, yarn festivals, and often they are found in unusual places, antique shops or market stalls.

I know many of you are obsessed with buttons too and I wanted to share a bit of button love. I now have a stock of pretty wooden buttons that you can purchase in my online shop or etsy shop.

The buttons are all wood, have 2 holes and have a pretty printed design on the front with a plain back. They are 15 mm in diameter and look great on hand knits, crochet or sewing projects but could also be used in scrapbooking and other papercrafts.

So far there is a choice of eight different buttons and I am selling them in packs of six. Each set of six comes packaged in a polythene bag with an AlderSign label, making them ideal for gifts and treats.

The colours are bright and fun and these would suit children's clothing or spring knits, perfect for this time of year. I don't know about you, but I am desperate to see some signs that the warmer weather is returning soon.

The backs of the packets are also decorated. All button packs will be posted out Royal Mail first class or airmail in a secure packet that will protect the contents.

I think my favourite of these are the red, blue and yellow flowers below.

I hope you like my buttons and visit my shop to have a look. It has been fun creating little bags and labels for them. I would love to hear about your button obsession too!


Fancy crocheting a cute pink pig cozy for your phone? This free pattern is very simple but I have added some hints and tips below to help you get going if you are new to crocheting. The pattern has been updated to include 3 sizes to fit different sized mobile phones. It is available for free here.
English crochet terms are used throughout this article.
The body part of this cozy starts with a simple chain and then double crochet (dc) stitches into the chain itself. Once you get to the beginning of the chain, the last stitch has 3 dc stitches into it.
You then need to turn the chain upside down and dc into the bottom edge of the crochet chain (it often looks like a little bar along the edge of the work).

Once you have joined the dc stitches in the round, this gives a flat bottom to the cozy. Then the body of the pig cozy is made up of rows of dc stitches into each dc of the previous row.
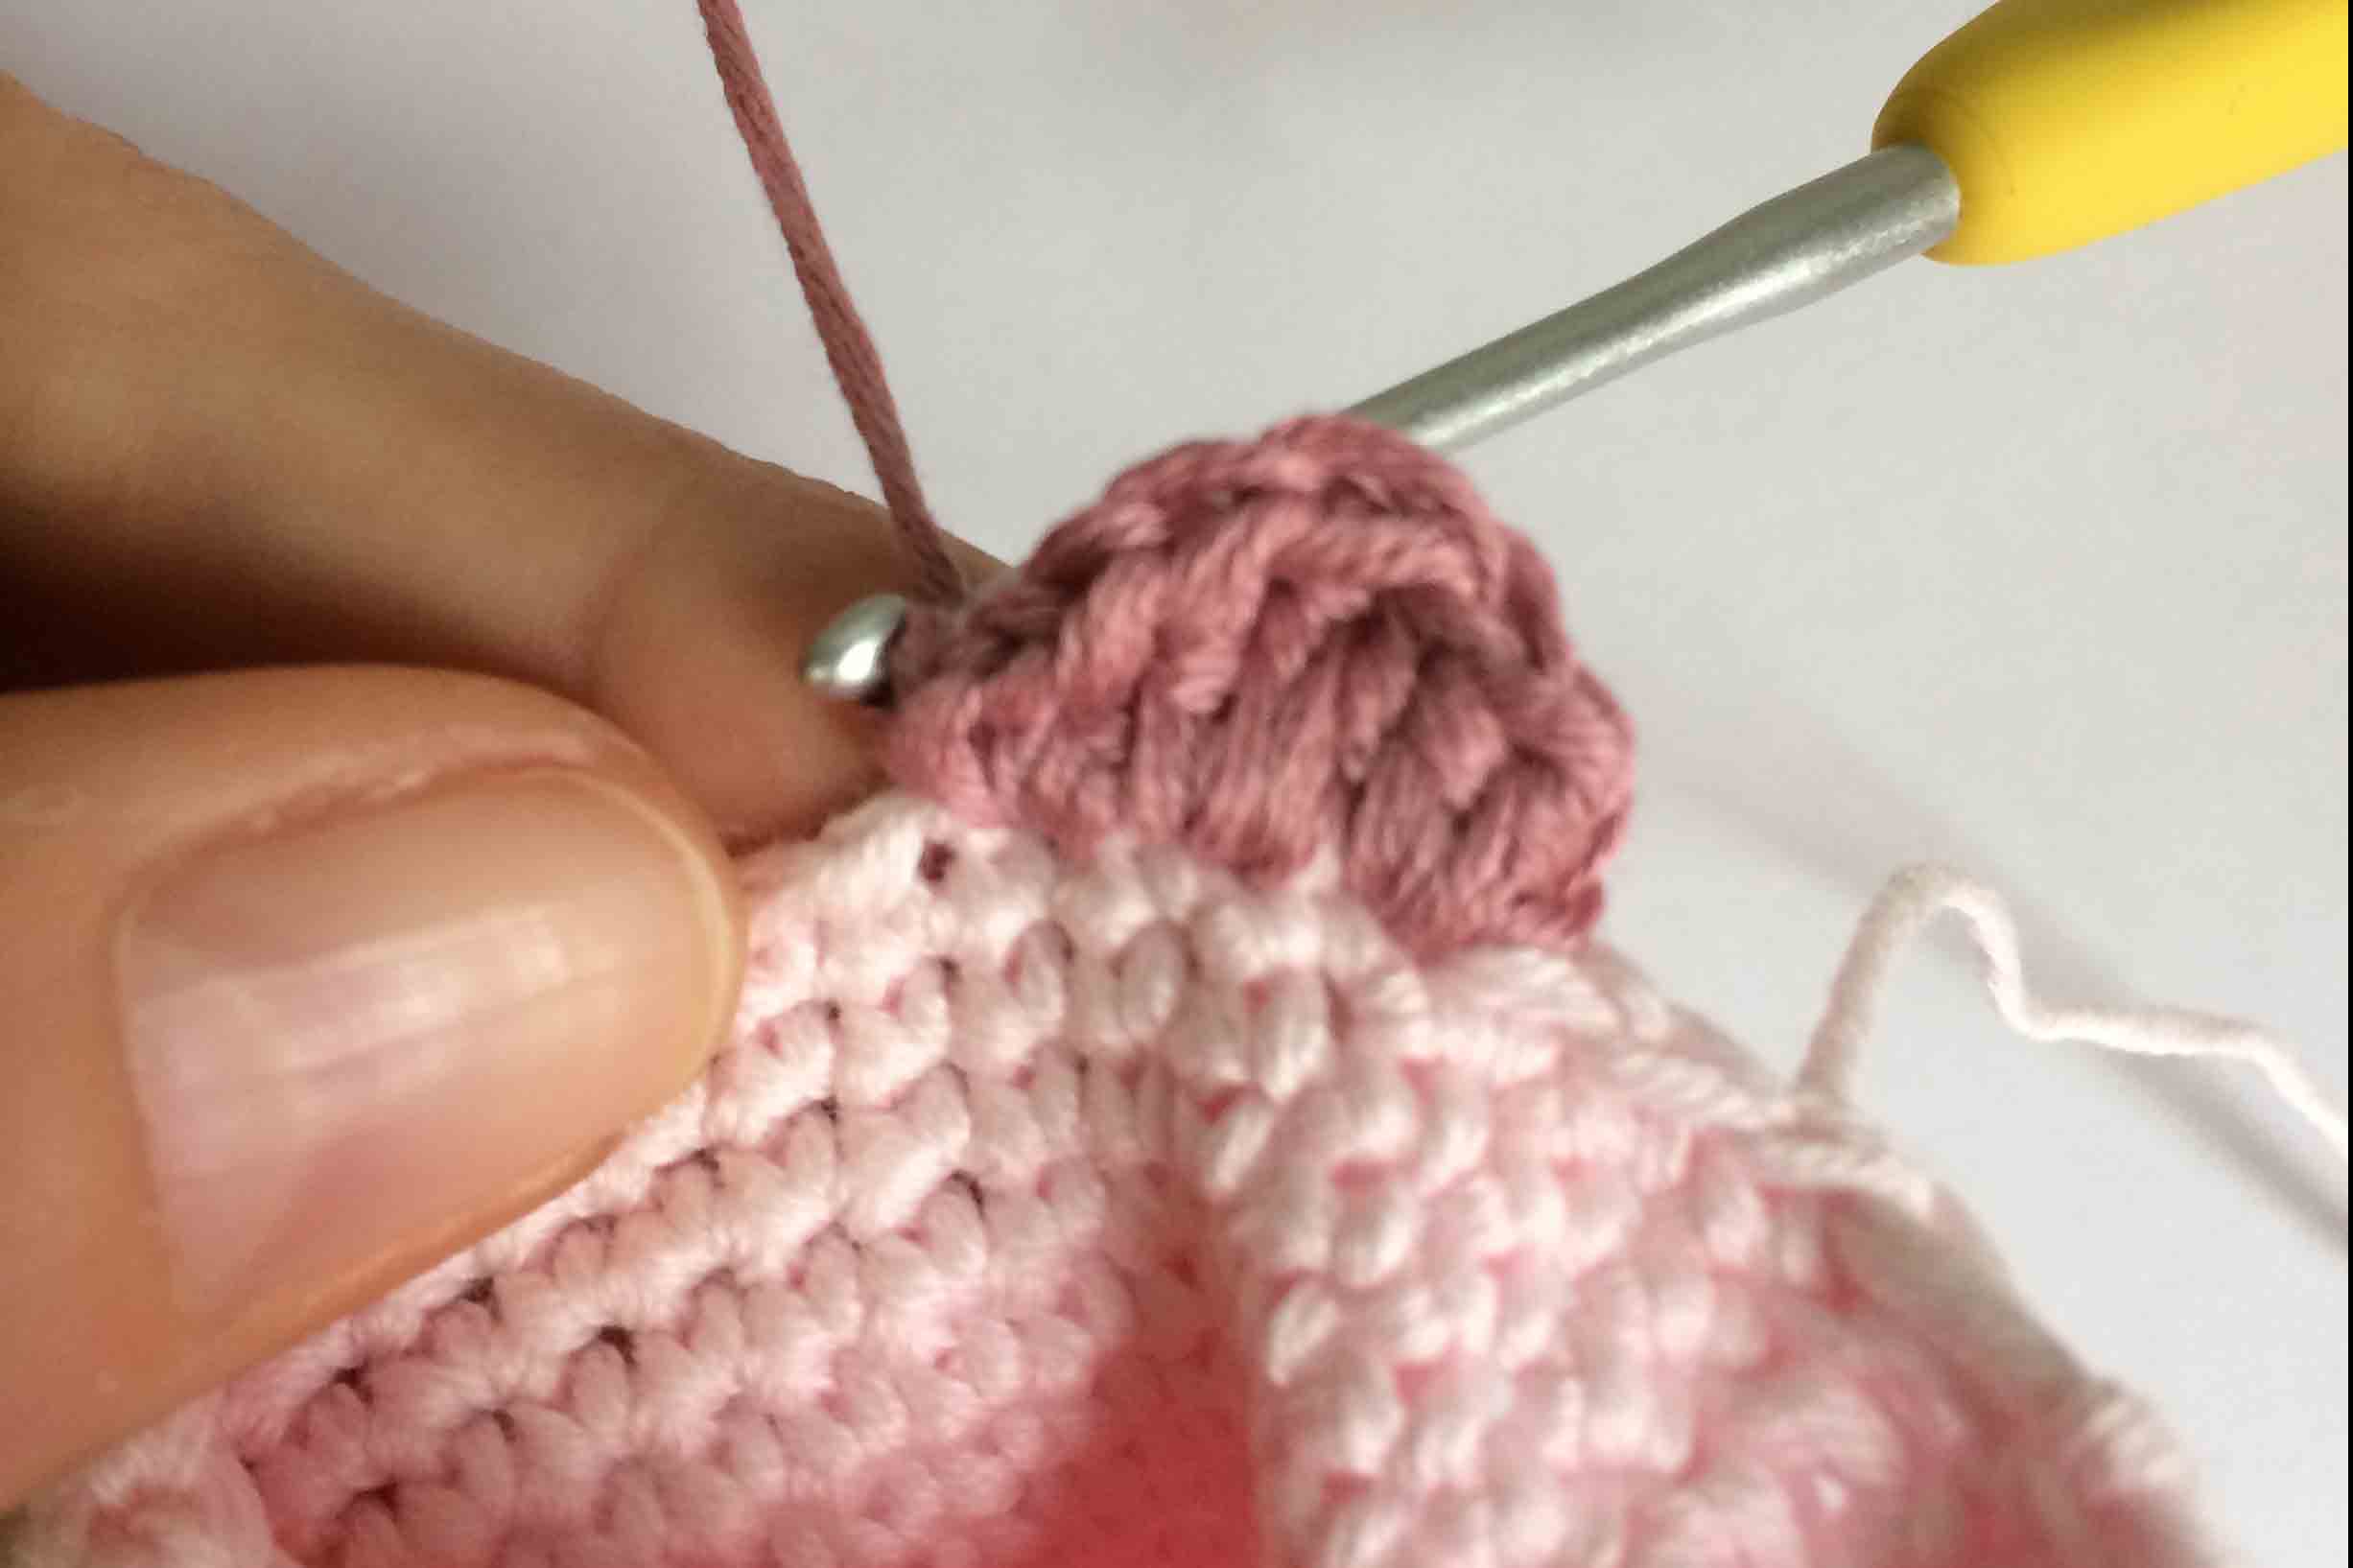
The two little ears are made by changing to a darker pink yarn. The light pink yarn will not be used for the moment. To stop it unravelling, draw through a large loop of the light pink yarn and leave it hanging for the moment.

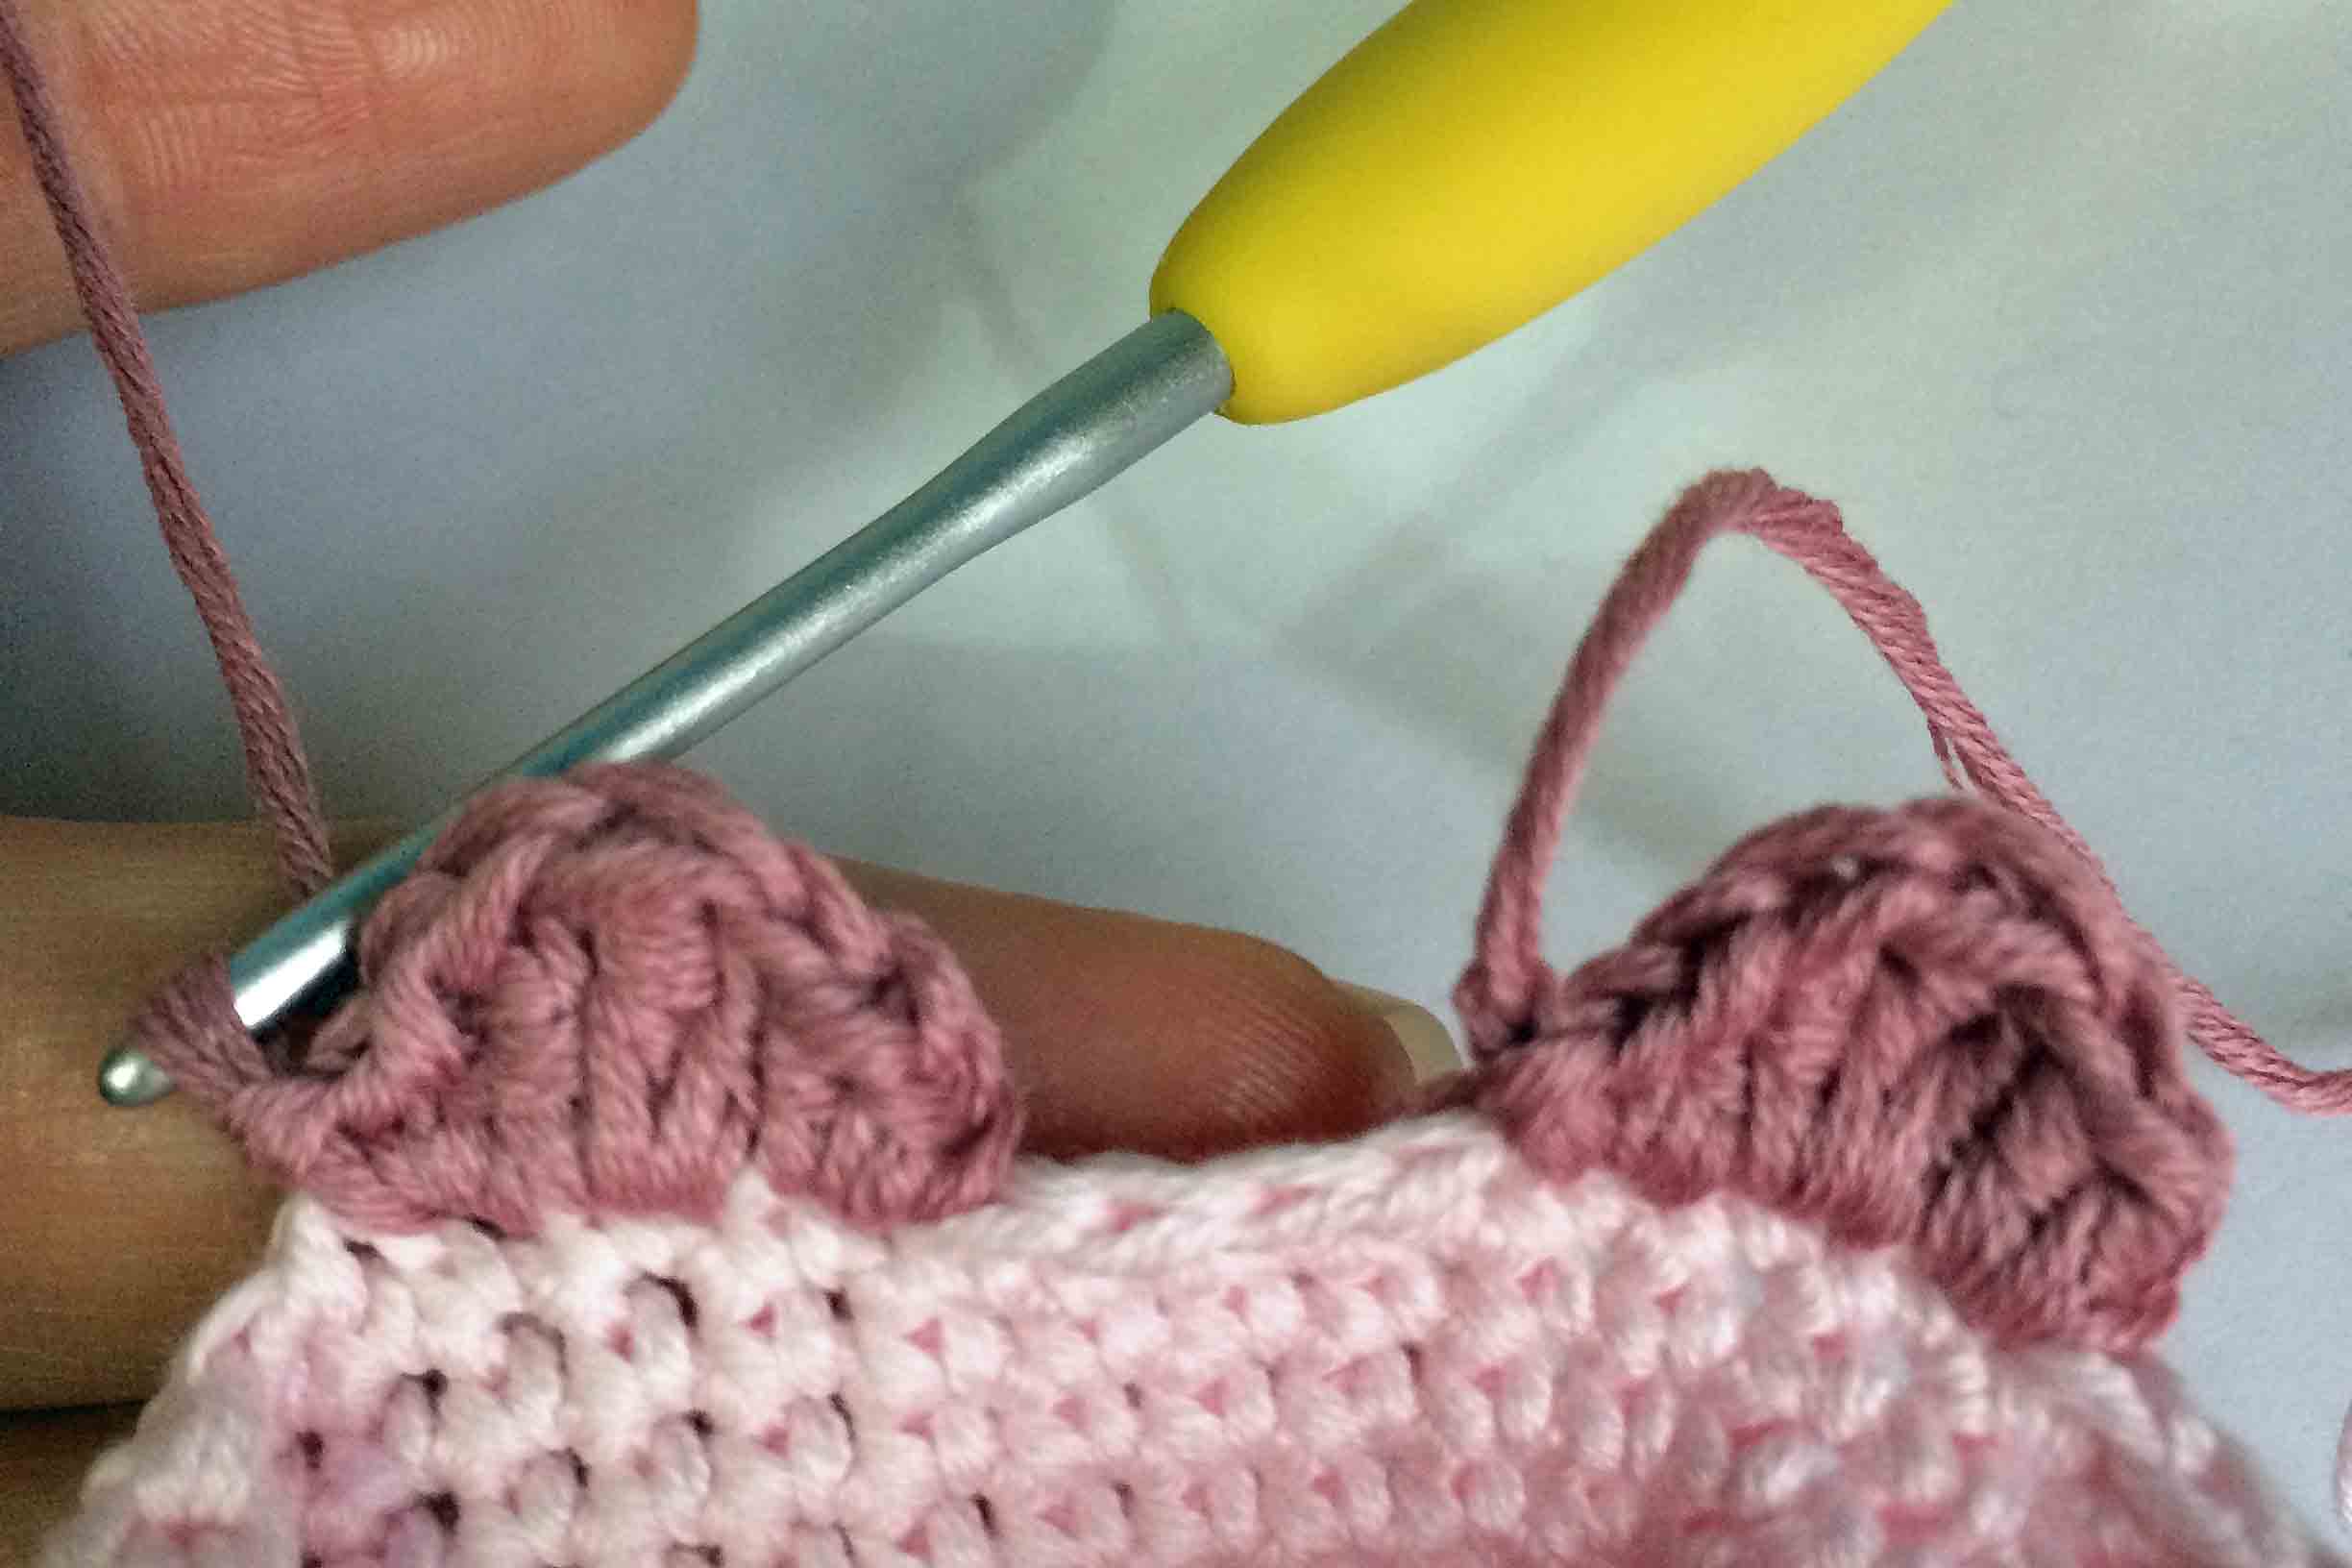
To rejoin the dark pink yarn in the correct place, miss the number of stitches the pattern gives for your size of cozy and then in the next st, put your hook under the top of the dc and draw through a loop of the dark pink yarn.

Work the ear stitches as described in the pattern with the dark pink yarn. After the first ear is complete, break the yarn and fasten off.
Repeat the process for the second ear following the instructions for placement in the pattern.
To finish around the top of the cozy a final row of dc covers all the stitches with decreases at the corners which narrows the opening slightly, keeping the phone securely in place.
Using the light pink yarn which was left hanging, pull the yarn back to a normal sized loop and place on your hook ready to go. One dc stitch is worked into each stitch of the ears except for the double treble crochet (dtr) stitch which has 2 dc in it - this is the centre stitch of each ear.

The nose is worked flat so there is a right side and a wrong side. The nostrils are made using an intarsia technique.
To create a neat colour change, work to the stitch before the colour change occurs. Start the stitch as normal but do not finish the stitch.

The stitch is finished by using the colour yarn of the next titch.

The process is repeated for every colour change across the row. Do not break the yarn between the colour changes but instead leave it on the wrong side of the nose and pull it up to use again as needed.

When working the wrong side rows make sure the yarns always keep at the front (wrong side) of the work to stop them showing on the right side.

When you have finished this step the back of the nose will look a bit like this.

The final round of the nose is a dark pink dc edging. The dark pink yarn is rejoined to the last dc worked as before by drawing a loop through the top of the stitch on the row below.
Work one dc into to top of each st along the top row, one dc into the side of each st of each row down the sides, one dc into each st of the bottom edge of the foundation chain and again one dc into each st of each row up the other side. Join in the round with a slip stitch into the first dark pink dc and break yarn and fasten off.

Use a running stitch in the light pink yarn to sew the nose to the front of the pig cozy in the centre. Use small stitches so they cannot be seen and sew just underneath the dark pink edging.

The tail is just one row of decrease stitches (double crochet 2 together) into a foundation chain which gives it a characteristic curl.
To attach, thread the tail of yarn from the slip knot and the tail of yarn from the last fastened off stitch either side of one dc stitch on the back of the cozy in the centre about 4 cm (1.5 inches) from the bottom and pull through to the inside of the cozy. Weave in both ends securely.

Finally to finish, block your cozy by soaking it in water and then pinning it out to dry in the correct shape and size.
Pink Piggy Phone Cozy is a free pattern that is available on this website. Please check out my other patterns, including other free patterns here. Like my work? You can sign up for email updates and exclusive offers here.

Last year I was lucky enough to go to Salt Lake City Comic Con. I was in Salt Lake City for a conference and as a happy coincidence, the comic con was on at the same time. My favourite stand (and where it must be said I spent all my holiday money) was the Weta stand. Weta are the company that do a lot of the props and creatures for the Hobbit and Lord of the Rings films by Peter Jackson, which I love and have watched far too many times.

Balrog
Not only were they selling fantastic souvenirs but they also sold yarn kits!! I think I died and went to geek heaven - yarn and comics in the same place. They had kits for Bofur's gloves or his scarf. I was torn but eventually went for the gloves (and the white tree of Gondor pendant in the photo below).

The yarn is called Mithril (great name for a dwarf-inspired yarn) by Stansborough who supplied the wool for the clothing in the Hobbit film. It comes packaged in a cute little box with the pattern, an info sheet about the blue grey sheep that supplied the wool and a little card to certify that this is official merchandise.

The pattern is really simple, knit in the round moss stitch gloves which look great in this yarn as the effect looks like chainmail. They yarn has great stitch definition. I would love to make a textured jumper out of it with lots of moss stitch.
I made the larger size and used every last bit of yarn. They are still a bit on the small size, I would have liked to have made them another inch longer in the hand so they would fit comfortably past the knuckles but overall they look great.

February is proving to be a busy month already with another one of my patterns published. This time it is Cozette - a cowl with a difference - and you can find it in the Best of British issue of Knit Now, issue 44.

The idea for this cowl came to me when I was swatching lace patterns and trying to make a reversible pattern that looked good on both sides. I wanted something warm and pretty, with no 'wrong' side that shows when the cowl is wrapped around my neck.
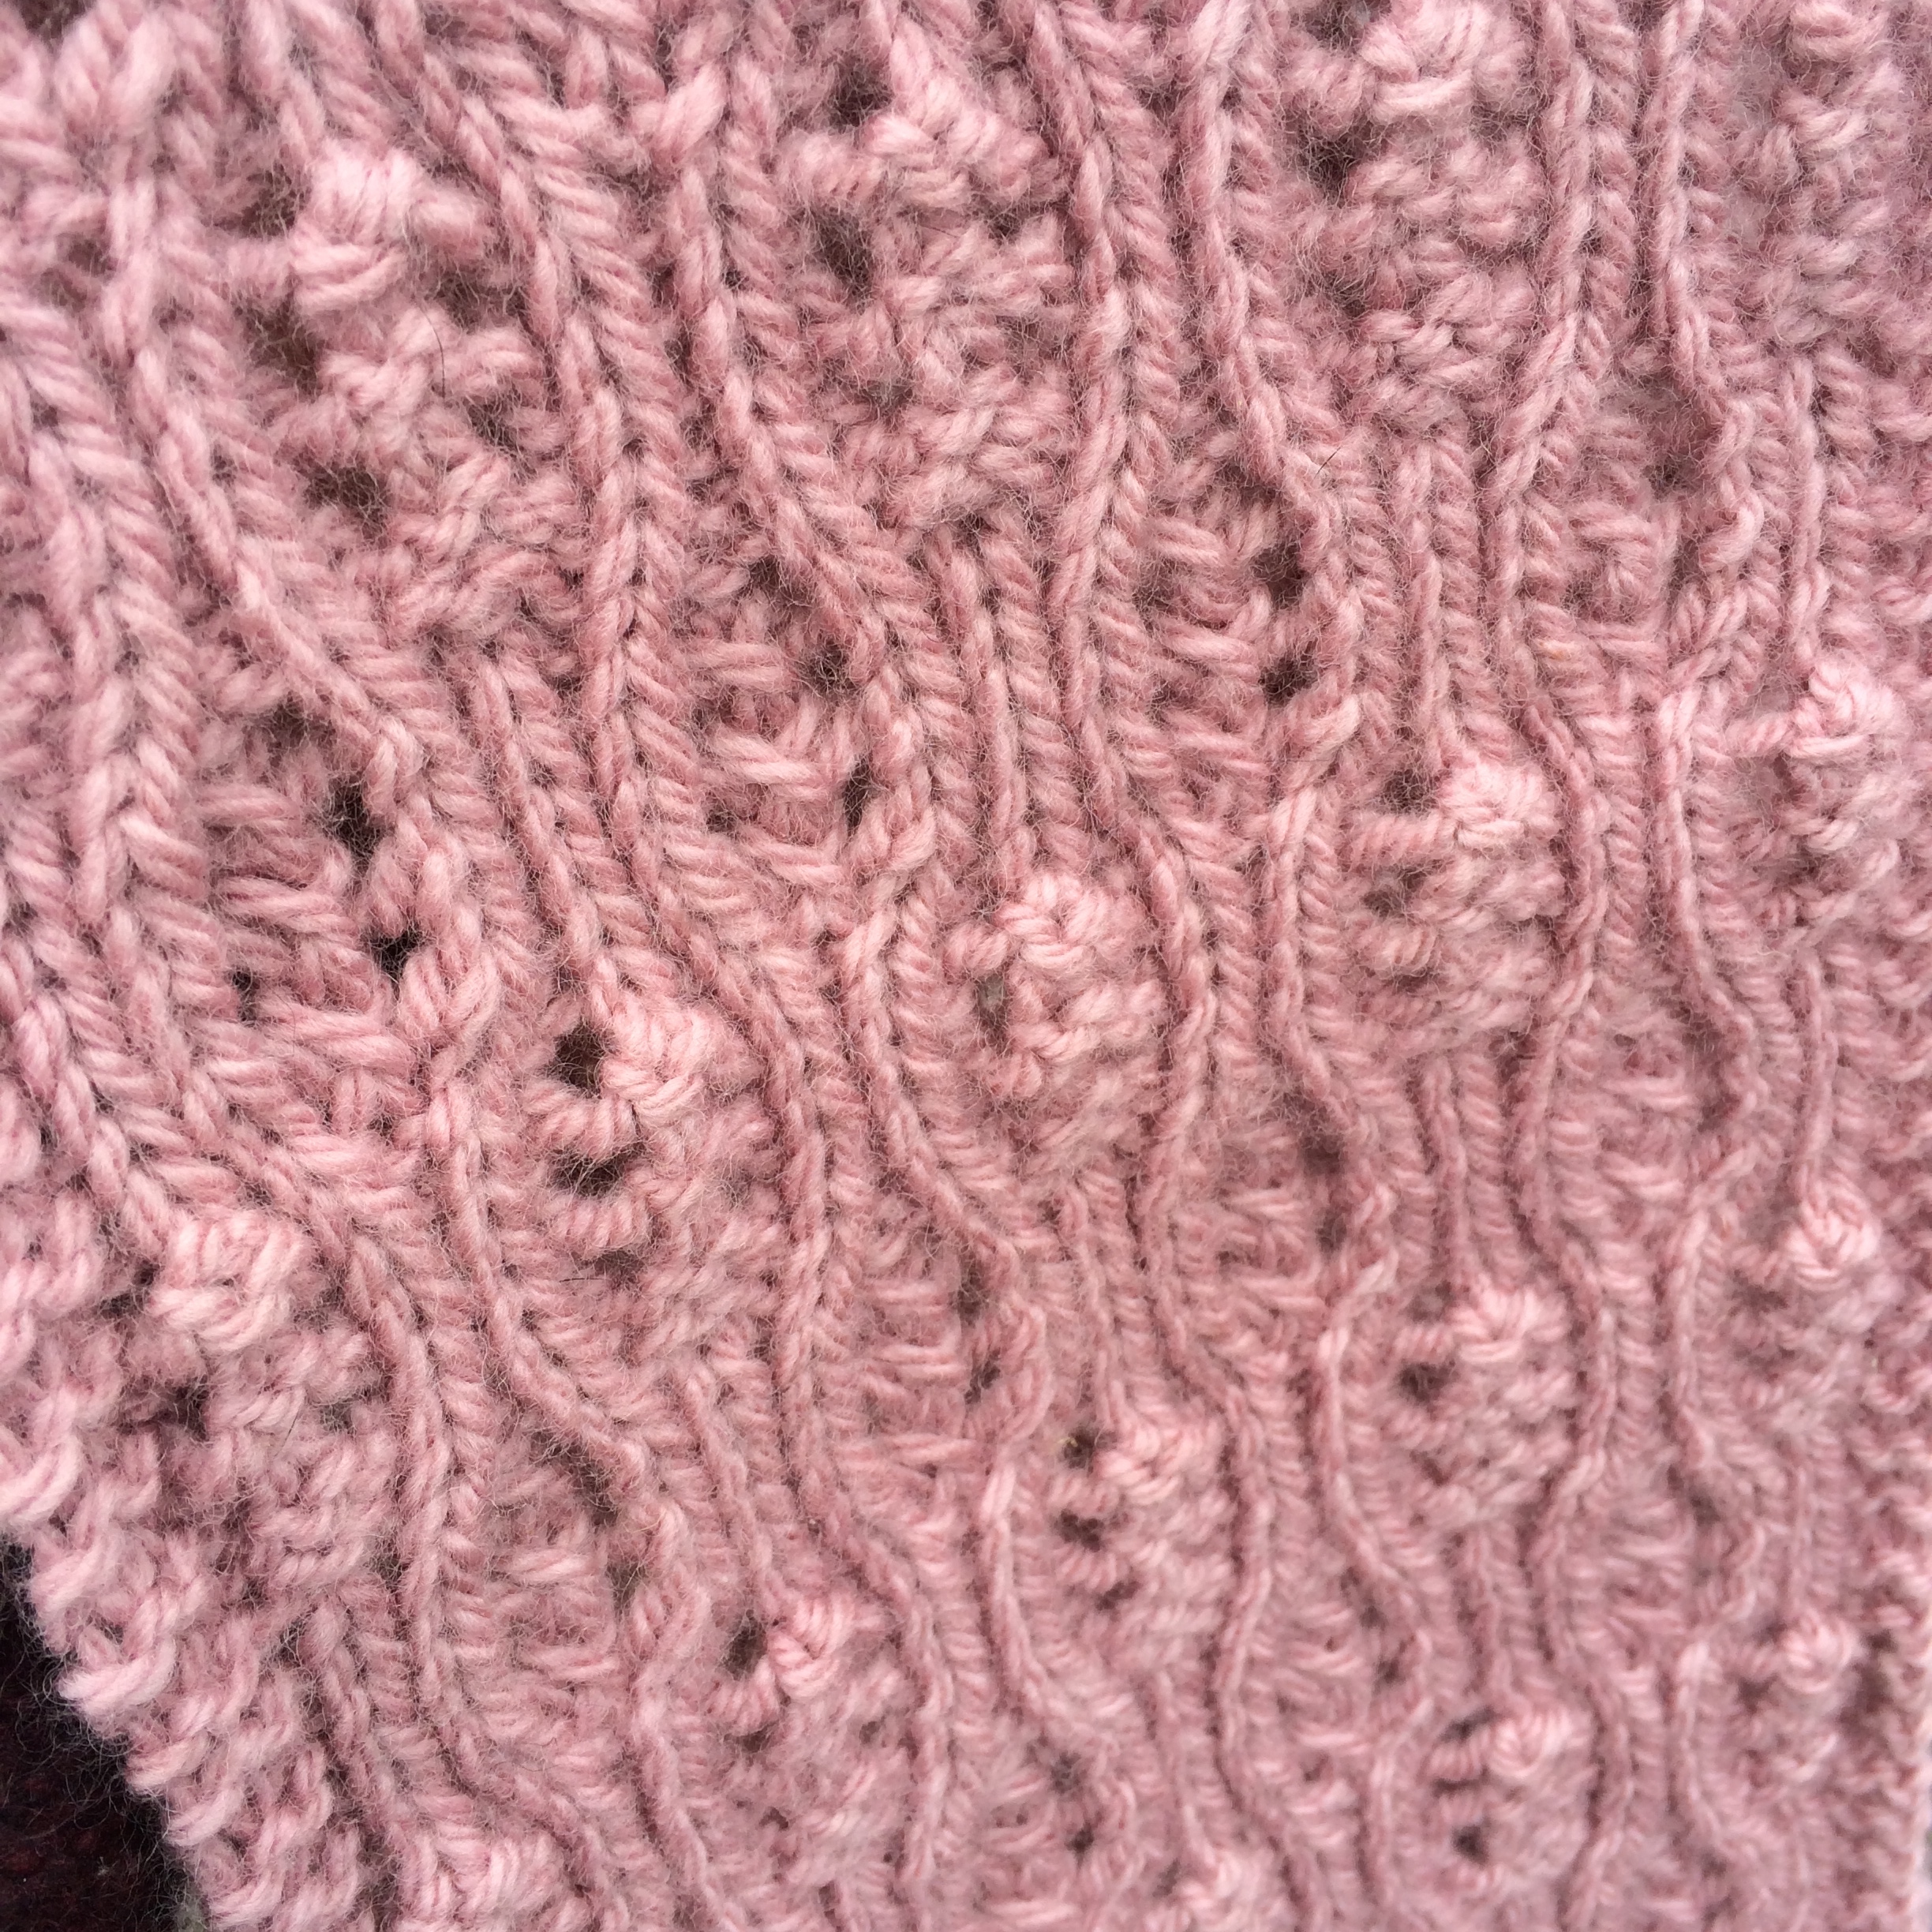
Cozette has a simple repeating lace pattern that is easy to learn and it looks the same on both sides so there is no 'wrong' side to show when wrapped around your neck. It also has a ribbed cuff with button closures. The buttons and reversible lace means that it can be worn draped long around your neck, or wrapped up cozily to be very snug. It can even be worn open like a scarf or twisted before buttoning to be an infinity cowl.
I used 2 skeins of Eden Cottage Yarns Langdale Aran in Rambling Rose to make the cowl. I love this yarn, such pretty colours to choose from and the yarn is warm and smooshy. It is even dyed locally in West Yorkshire. This sample was knit by my good friend Sharon.
I am looking forward to getting this sample back to wear next winter. I am also coveting some matching mittens and hat. I think a coordinating set would look great and be really snug!


My first new pattern of 2015 has been released - Horwood is a pretty textured beanie hat that is perfect for this time of year. It has been snowing here for the past two weeks and whilst the Green Man is definitely winning over Jack Frost (it is Imbolc today), it is still very much hat-wearing weather.

Horwood is knit in the round and has rows of moss stitch and simple cables to give a pretty textured pattern. It is designed to be worn with a bit of negative ease (so it stays on your head when the north wind blows) and it can be worn as a slouchy hat or beanie.

I have gifted this pattern to the Knitting and Crochet Guild (KCG). All sales through Ravelry and Love Knitting will go to KCG to support the work that they do in education, innovation and preservation of knitting and crochet work. I have been a member of the guild for two years now and I'm pleased that I can contribute to this charity. They have local branches all over the UK with regular meetings as well as an annual convention. I would recommend joining, there are many benefits, including being able to look through the collection - which is huge!
This hat is named Horwood after William Horwood, an English fantasy novelist that I have enjoyed reading through my teenage years and again more recently with his new Hyddenworld series. Duncton Wood and its sequels was one of the first fantasy series I read as a teenager, and the Wolves of Time is my favourite. It follows wolves as they are guided by their spiritual beliefs in ancient wolflore to gather from all over Europe to Wulfrock, all the while a human war is ongoing. It is dark and often violent story but well worth a read.
Currently I am reading the second book in his new series, Hyddenworld. I love fantasy novels that take me away to another world.
"The Hydden, the little people with whom we share our world [...] the holders of natural lore and guardians of our link with the Earth".
It was looking through the photographs of this hat that helped me decide on Horwood as a name. The birch trees and wooden door backdrop reminded me of the Hyddenworld stories and the woods the main characters travel through. The texture on the hat is very reminiscent of tree bark and each pattern section makes me want to carry on to knit the next one, almost like a journey. It is one of those patterns where before you know it, you are at the crown shaping and the hat is done.

January is flying by and I've not done half of the things on this months to do list yet - where does the time go? I had decided to give myself this weekend off from work. I have been very busy since the New Year with submitting research grant applications, marking student assignments, preparing for my annual NHS appraisal (passed - phew!) and writing knitting patterns for my first collection and not had a day off. The trouble is, I'm just not very good at not doing anything when I know there are jobs to be done.
So, yesterday I took some kits to Crafty Praxis in Huddersfield as they had run out of some lines over Christmas, picked up some buttons for a pair of baby shoes I have crocheted for a friend due any day now and purchased some yarn as my step-dad has bought himself a new mobile phone and the old piggy cozy no longer fits so he has requested a new one. Apparently I don't have any pink 4-ply yarn in my stash - who would have thought that possible??? So my rest day was quite busy in the end.
I also started updating another pattern to my new layout. This time it is the turn of my Cuckoo knitting pattern. I love this pattern as it is so easy to knit but looks pretty realistic and cute at the same time.

This pattern layout is slightly different to the Owly Bookmark pattern which is going to be my standard format. I love the long picture down the side of the normal format but it just does not work for every pattern. Some things just look better in a landscape picture - particularly fat little birdies like this Cuckoo.

The pattern has been updated on Ravelry and this website. I have also added the pattern to my Craftsy, Patternfish and Etsy shops. I have updated all these shops with my new company name so they should be easy to find.