Crochet socks, such as my new Coddiwomble pattern, need heel turns just like knitted socks do. They work better with some arch increases as crochet is less elastic than knitting, so getting away with a straightforward heel turn or afterthought heel is less attractive and can make the sock difficult to get on.
The heel is the most difficult part of the pattern and so I thought I would add a photo tutorial for those who like visual guides as well as the pattern instructions, particularly if you are fairly new to crochet.
This tutorial starts after the arch increases and the initial heel decreases have been completed, so we now have the bottom of the heel ready to go and we move onto the heel shaping. I am using Dc for double crochet stitches - translate this to Sc or single crochet stitches if you are used to American terms.
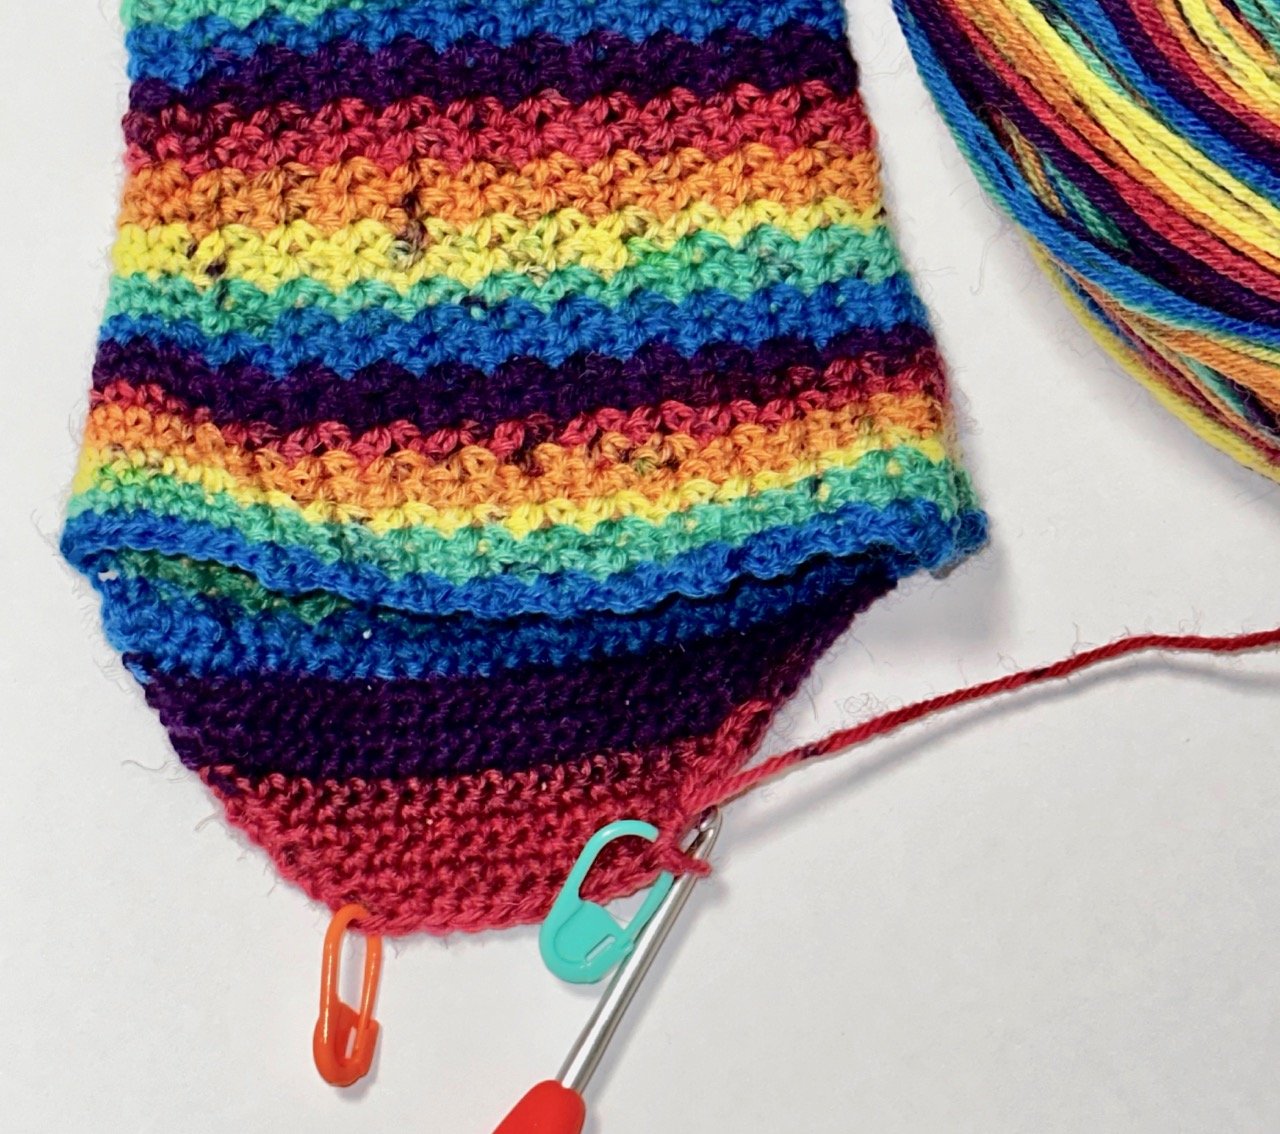
Arch increases and then heel decreases completed, the heel is ready to be turned. Stitch markers mark the ‘top’ of the heel.
Step 1 - Dc into the sides of the heel decrease rows
After the decreases are completed, the heel shaping begins with working dc stitches into the side of each row of the heel. At the end of the first side, the heel is then joined to the arch increases by a slip stitch. The same is then repeated for the other side of the heel.
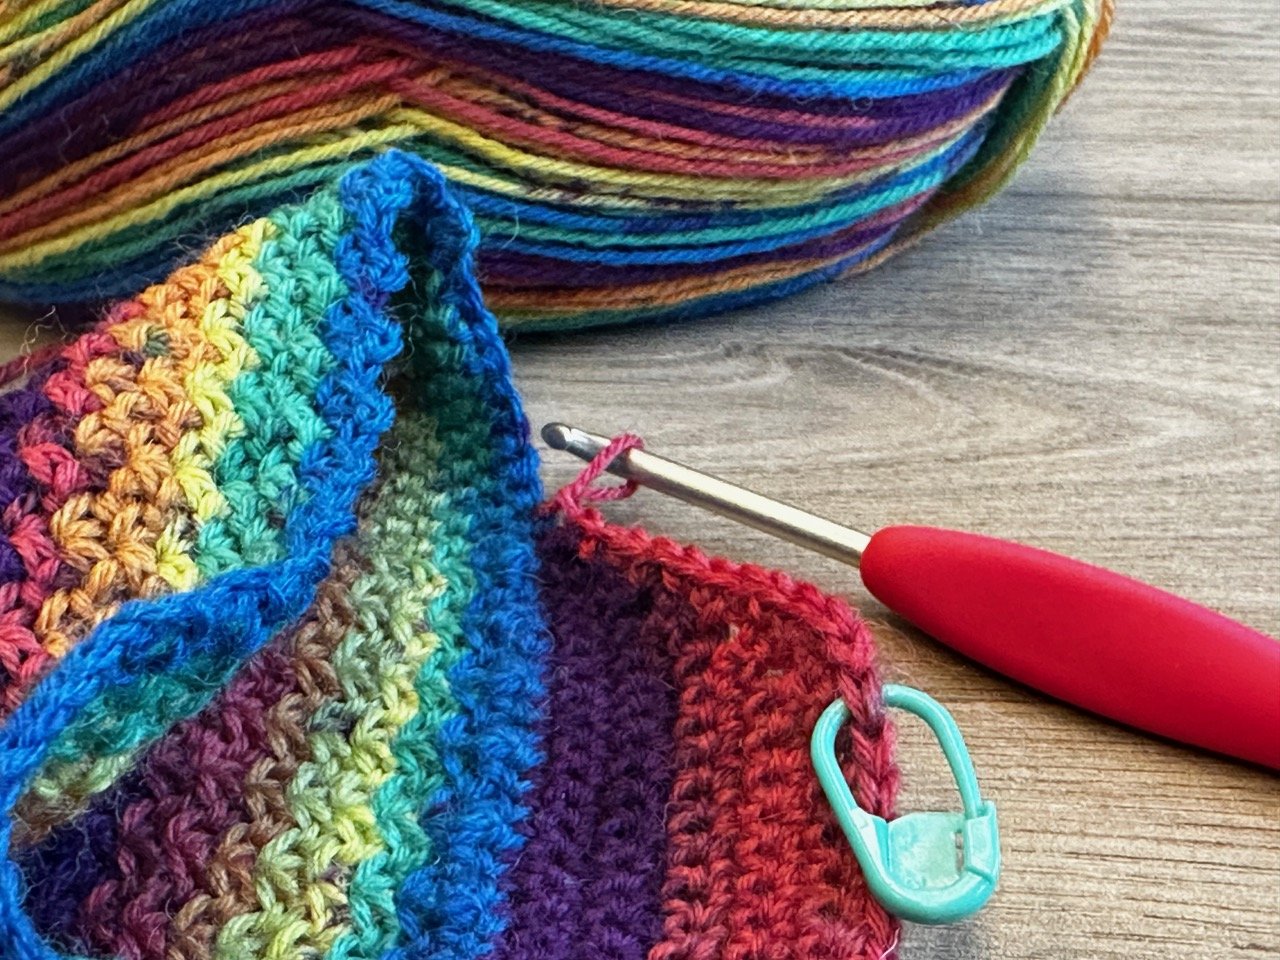
Dcs now worked down first side of the heel, followed by a slip stitch into the first arch increase.
Step 2 - increasing the stitches between the markers to turn the heel
Now we begin the heel turn. This part is worked by increasing the number of stitches between the two markers and slowly turns the heel, making it 3D.
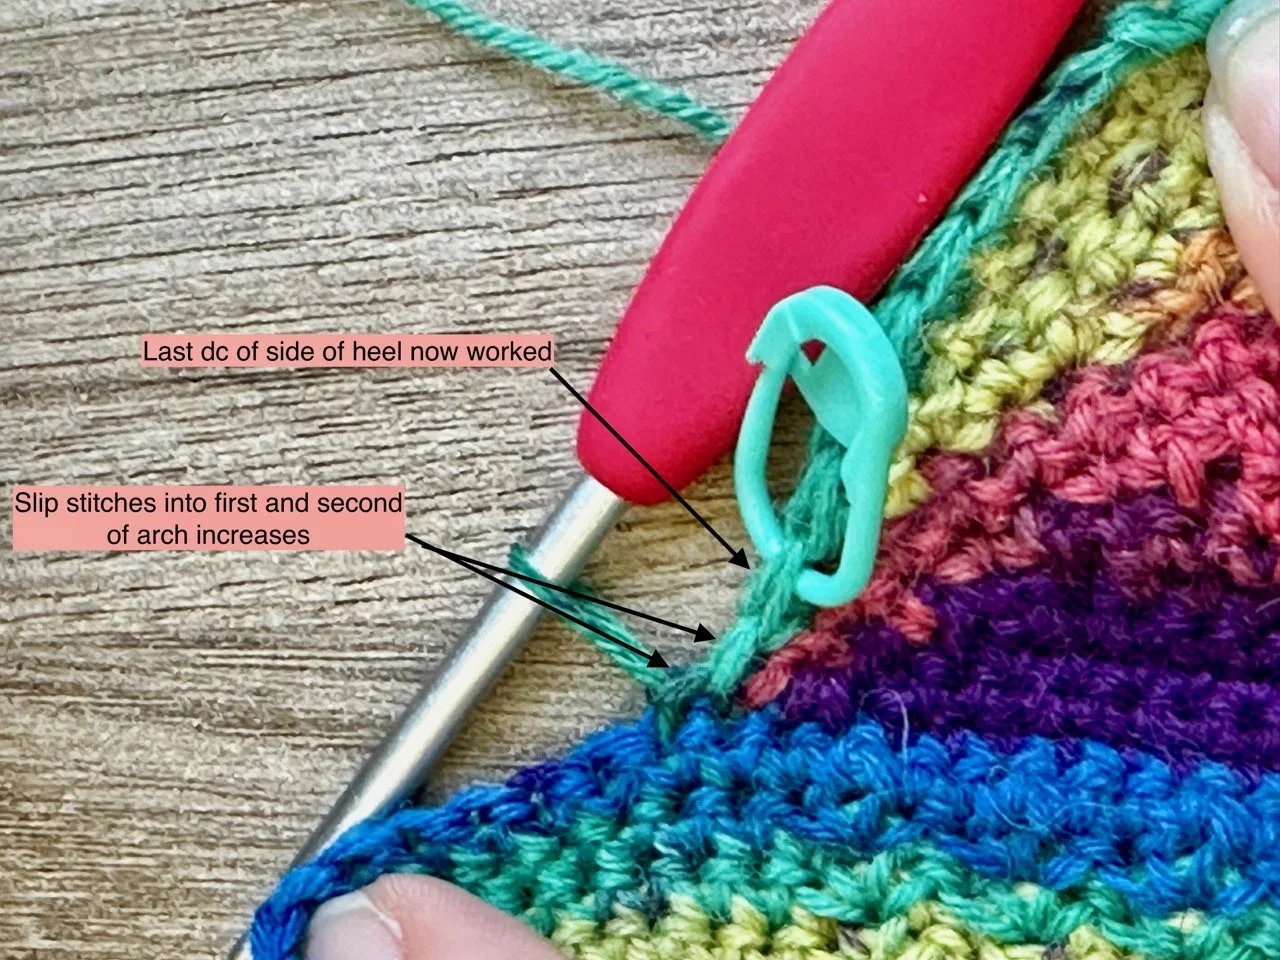
This next picture shows the heel before we work the next. We will dc in each st along the side of the heel to the orange marker, dc in the orange marked st and replacing it on the new stitch, then dc to the green marker. We will then dc in the green marked stitch, the next stitch and then slip stitch into the following stitch, placing the green marker on the slip stitch.

Dcs now worked down second side of heel.
This next photo shows the workings to the green marker and the crochet hook is positioned after the next two stitches to be worked after the marked stitch, the first with a dc, then with a slip stitich.

Dcs worked to marker, the extra dc and slip stitch to be worked are between the marker and the crochet hook.
The same is then worked on the other side, working an extra dc and slip stitch to the other side of the orange marker.

Green marker now on slip stitch, extra dc and slip stitch worked and orange marker moved by two stitchs.
The heel turn repeats are then worked back and forth, increasing the stitches between the two markers by two (a dc and a slip stitch) each turn.

Heel shaping rows being worked, with more stitches between the two markers, and the heel turn is starting to take shape.
Be careful when working out the next stitch to dc into after the marked stitch as the dc of the previous row with the slip stitch can be misleading. If in double, pull the work up a little and it should be obvious with a small hole which stitch has the slip stitch in and which is the next dc stitch to be worked.

Photo detail showing dc with slip stitch in and next dc to be worked.
Step 3 - Reducing the arch increases
When one stitch remains at both sides of the heel, we begin to decrease the arch increase stitches. On the first row of this section, we dc in the last stitch of the heel side (all stitches on this side now worked) and then slip stitch into the same arch increase stitch as previously worked in step one.

Showing one more dc to work on heel side and then same arch increase stitch for slip stitch to be worked into.
Showing after this row is worked with slip stitches into the first two arch increase stitches
The next row is worked the same, by working the last dc stitch of the side of the heel and then slip stitches into the second and third arch increases.
The heel is then worked back and forth, with dc in each stitch across the heel and slip stitches into the next two arch increases until one arch stitch remains to work.

Showing how the arch increases are decreased with each heel row.
Step 4 - Completing the heel
Once only one arch increase remains each side, the heel is worked the same. In the next two rows only one arch stitch is decreased with a slip stitch, and after the second row, all arch increases have been worked and you are now ready to start working the leg in the round again.

Heel now complete!
Et voila! The heel is now complete.
Happy crocheting!
Sarah x